High(ish) Voltage EPROM blast from the past

Using New tools on old parts…

Very early in my career, I lucked out and got a job at General Computer Company in Cambridge. GCC had a contract with Atari to write games for the 2600, and eventually were tagged to create their next generation system, the Atari 7800. I worked on 2600 Joust and Kangaroo, and also on Centipede for the 7800 as well as test code for the hardware and a sound driver that was used in several games.

7800 Eprom carts from my days at GCC

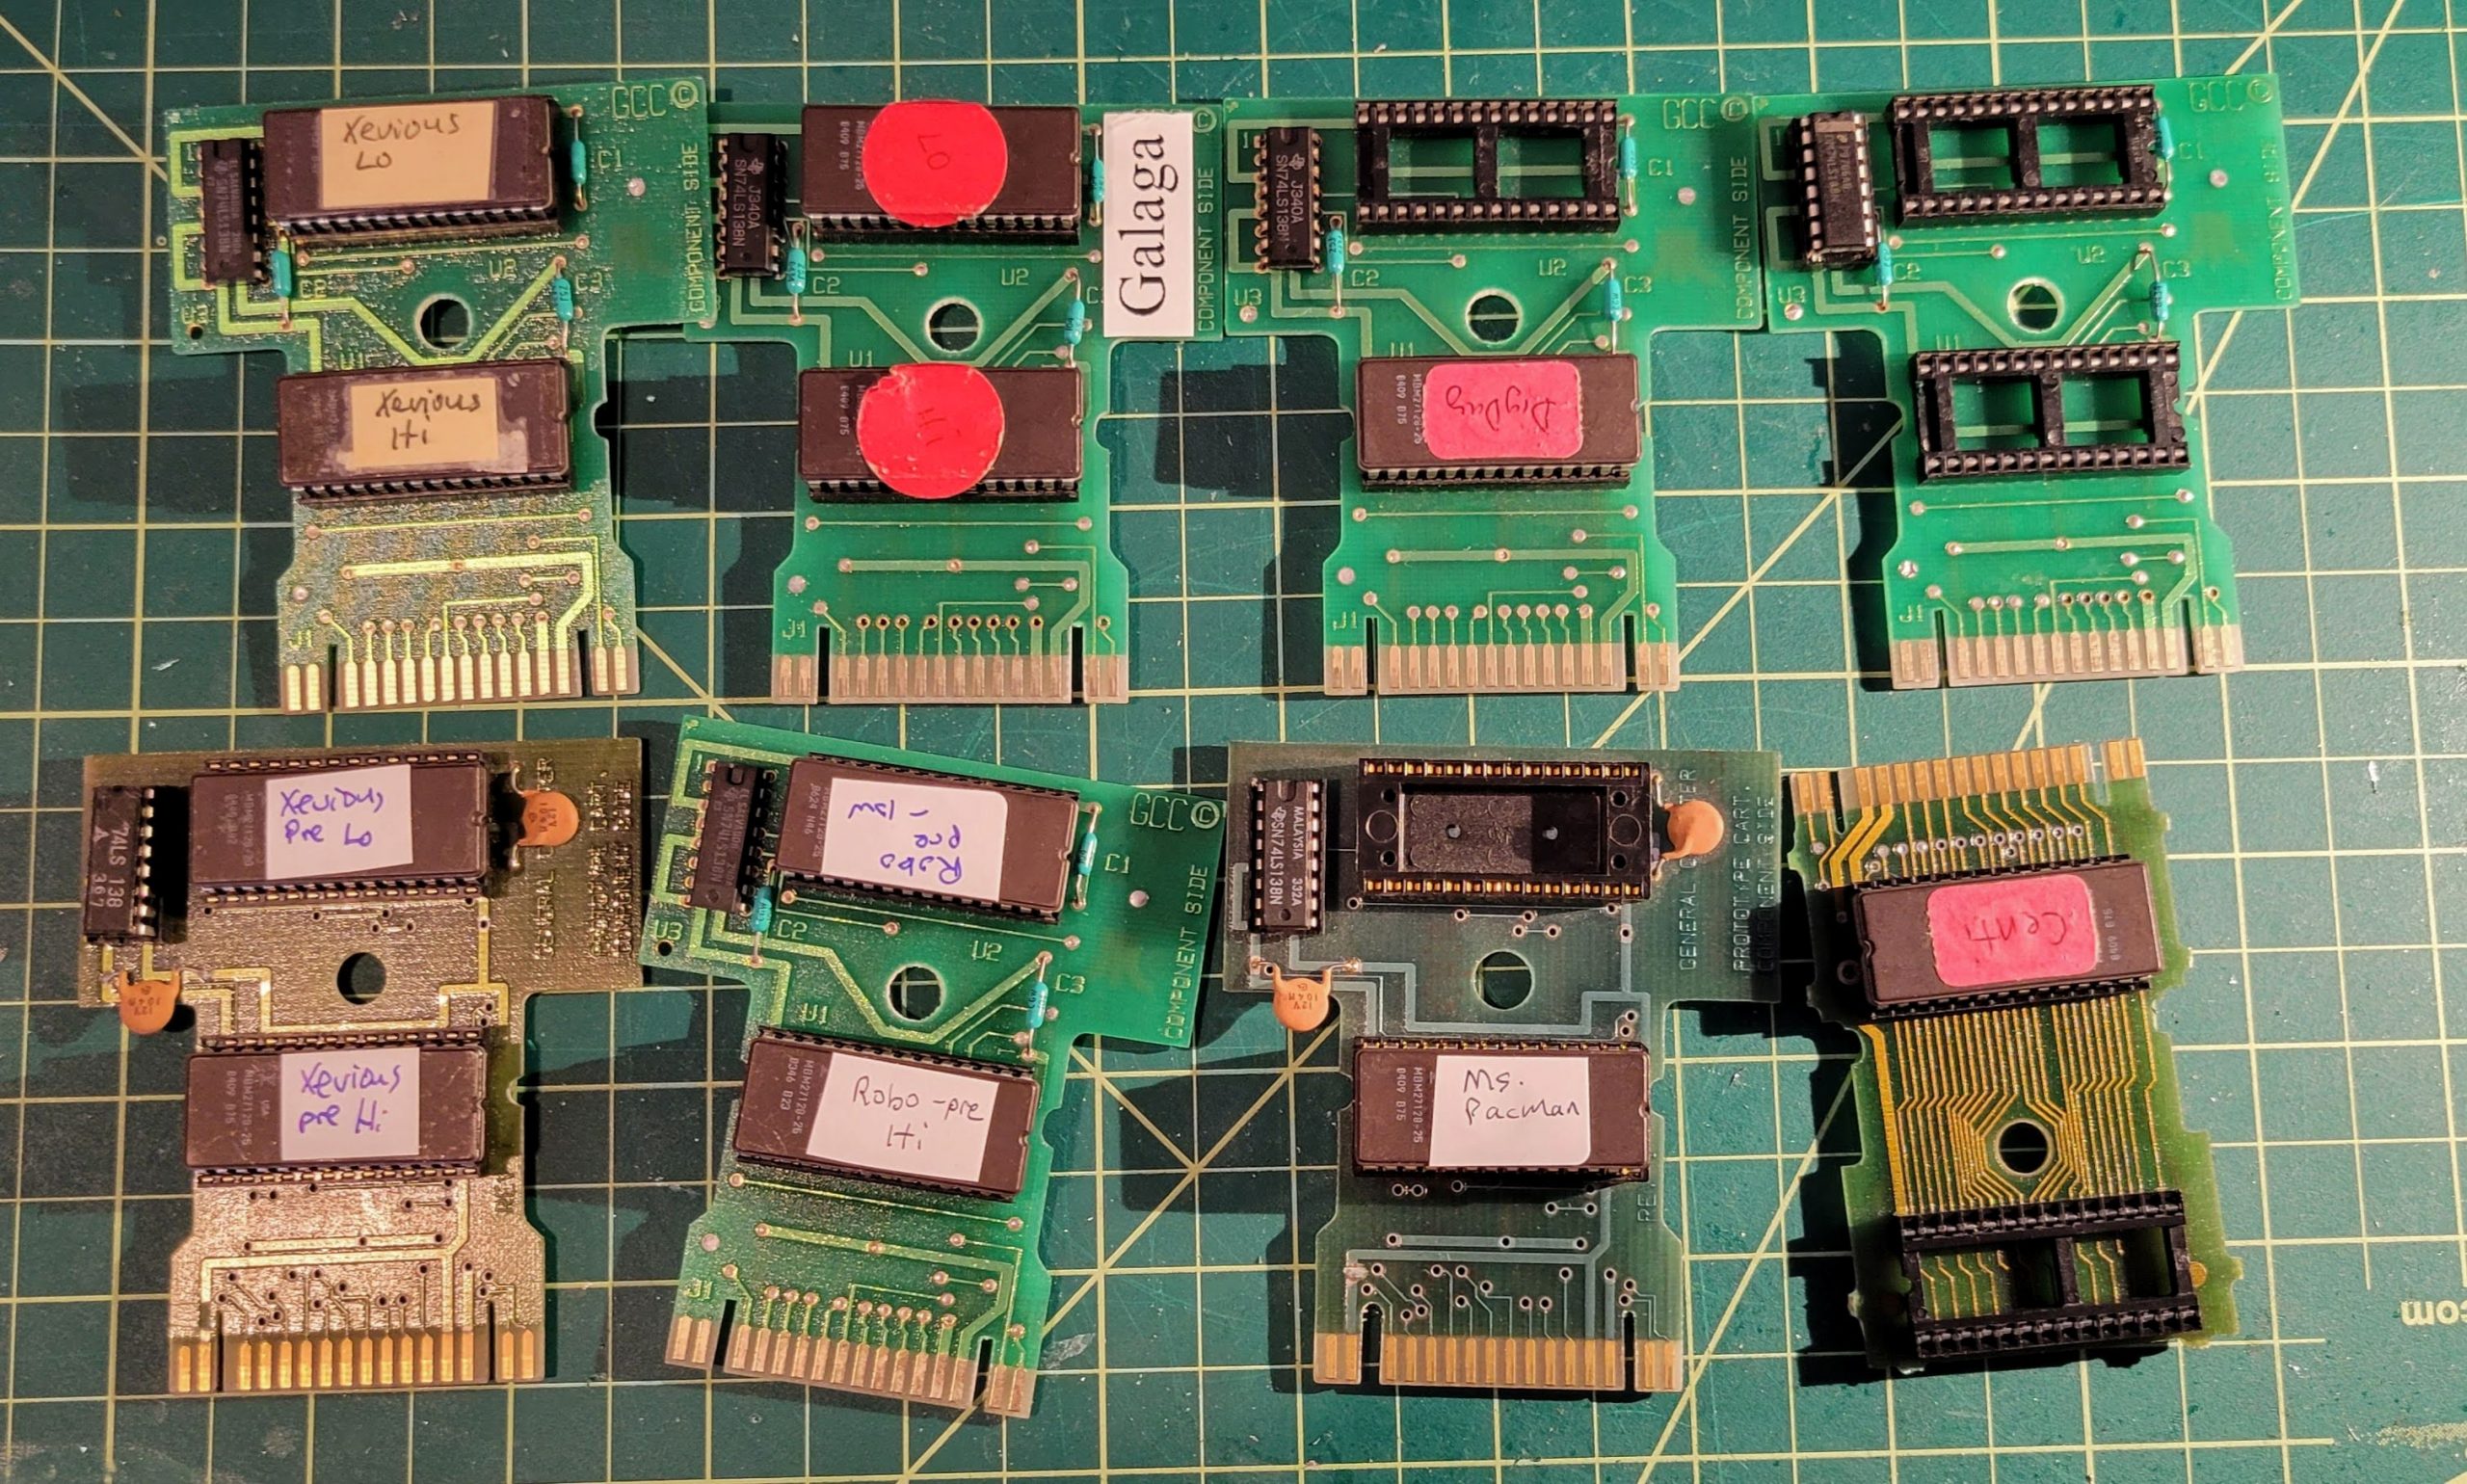
We were given 7800’s from an early production run, and I recently found mine in my attic, and dragged it out, and hacked it to have a composite output. I also had been carrying around these EPROM carts for many years, and I wanted to see if I had anything “interesting” or special.

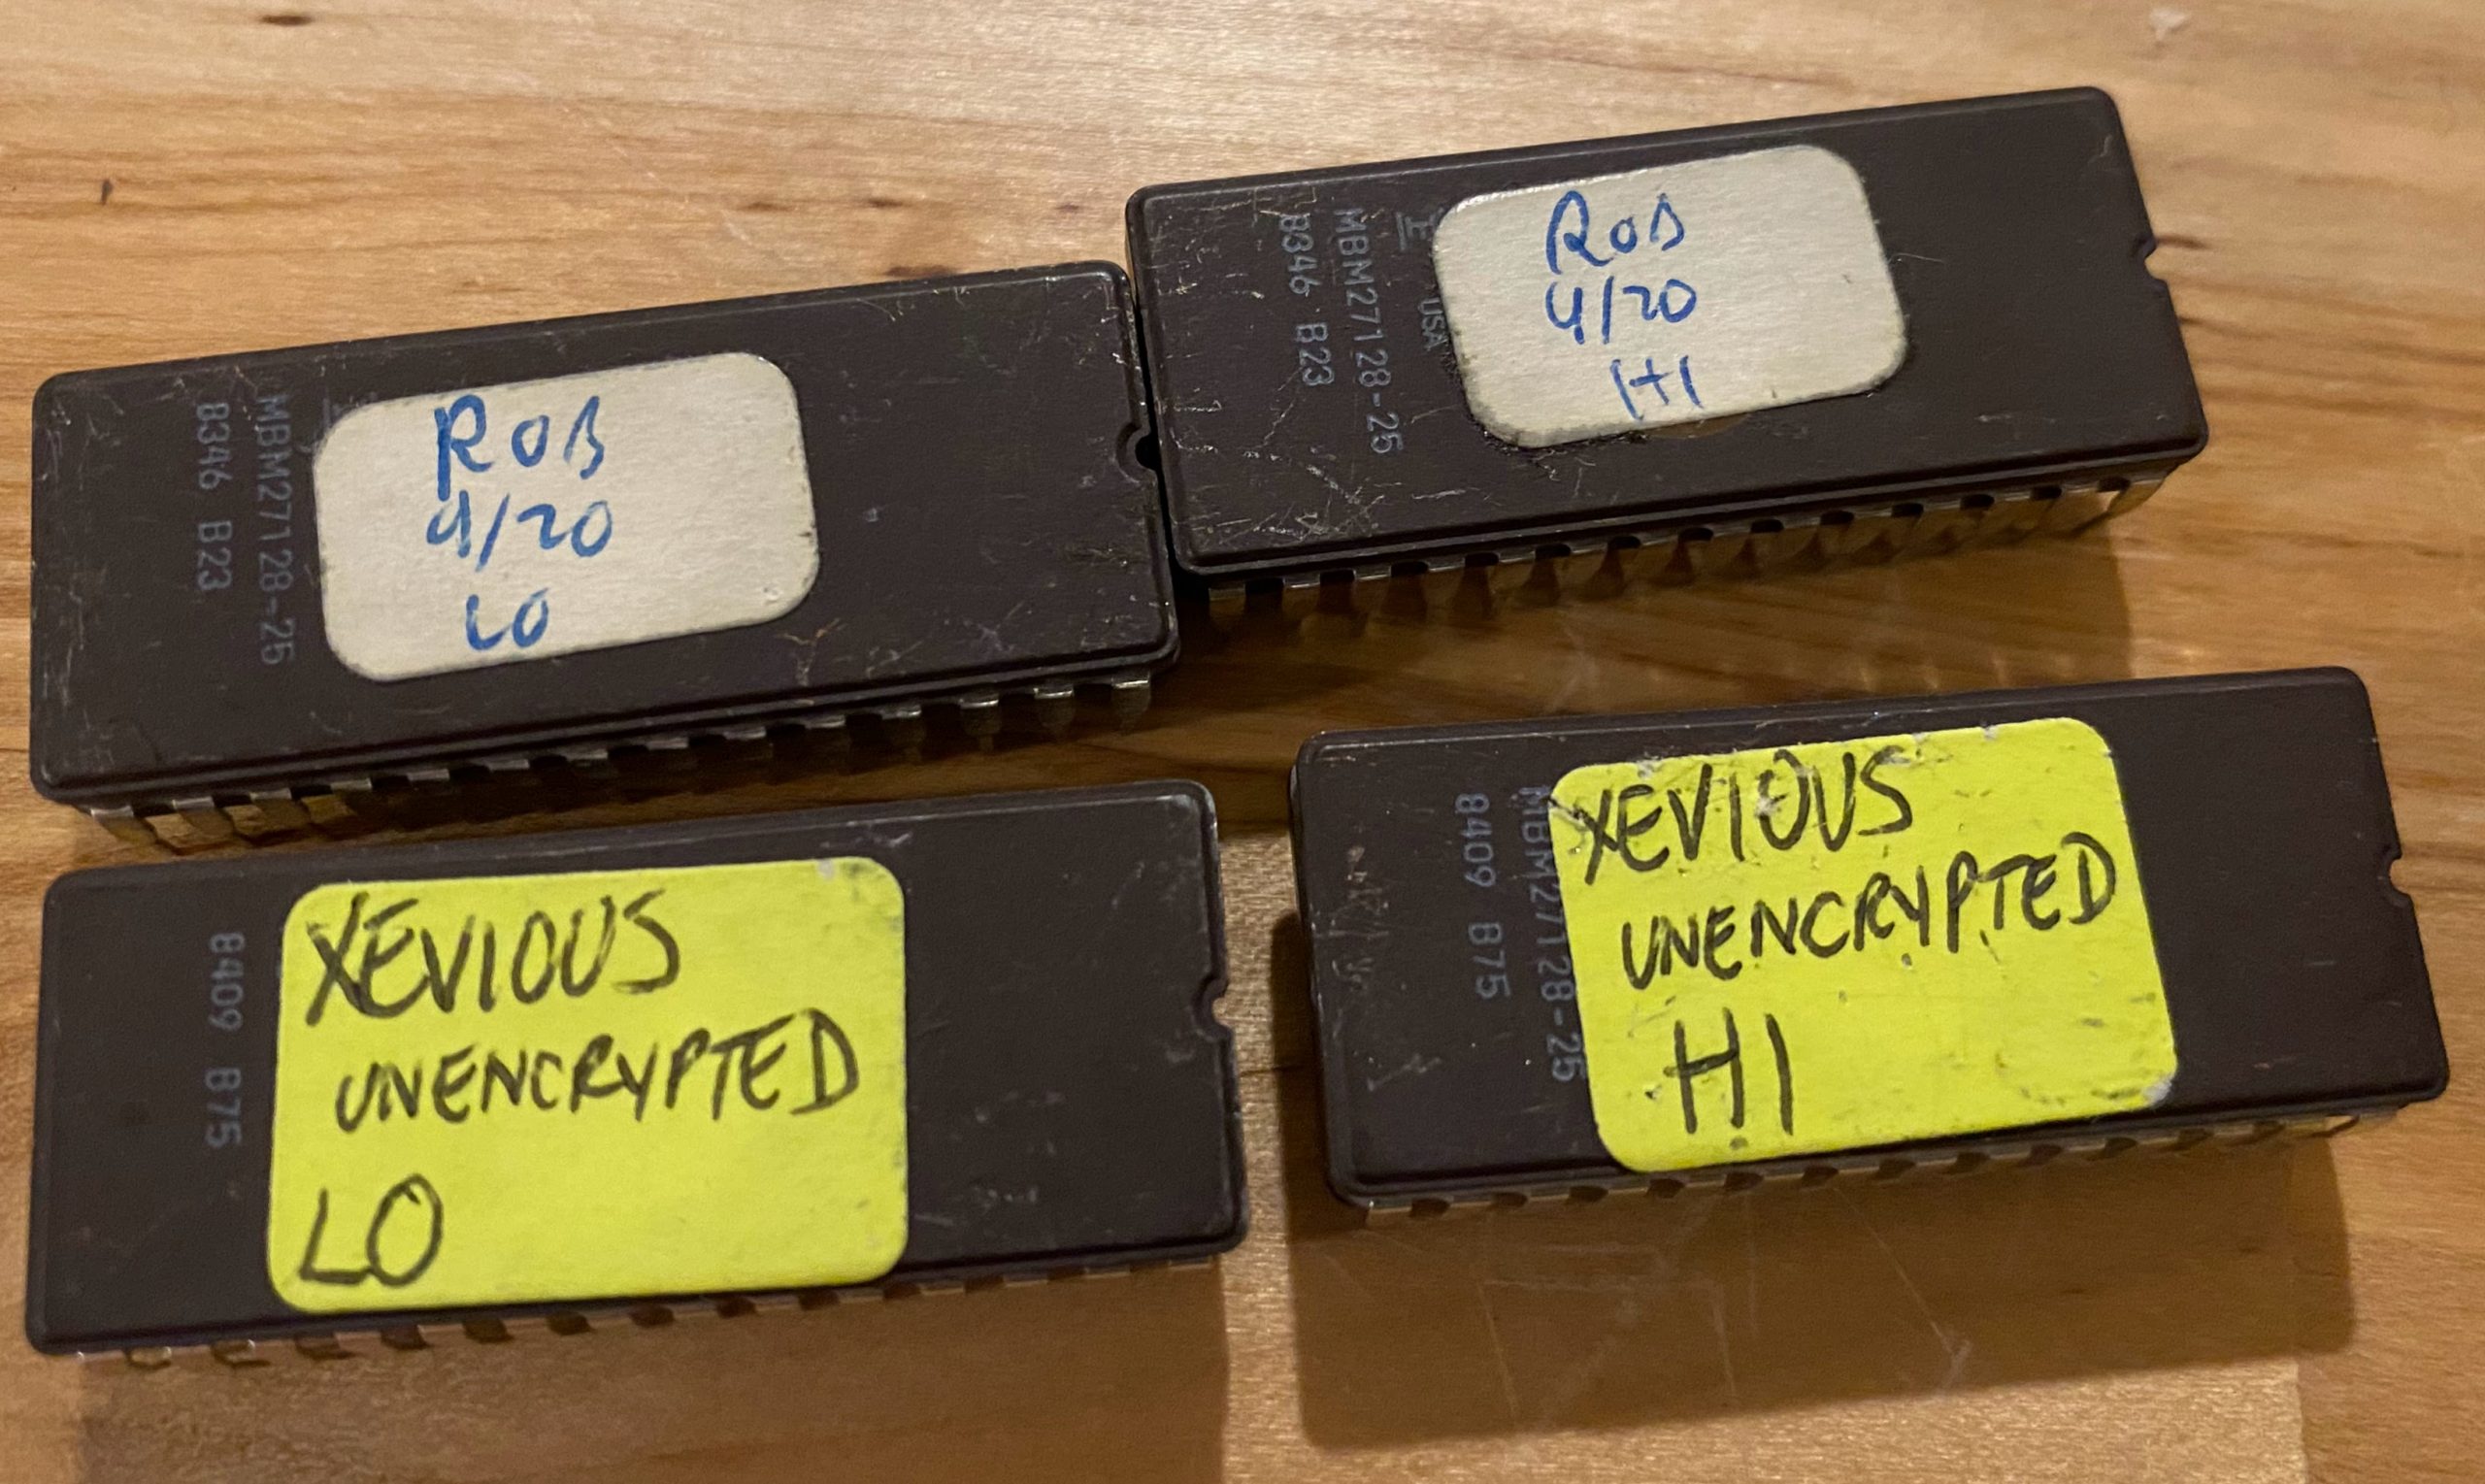
Once I got my 7800 running, many of the cartridges just worked, but there was one set that was labeled ROB 4(9?)/20 (probably Robotron 2084 written by my friend Carlos Smith) and another labled Xevious UNENCRYPTED (written by my friend Tom Flaherty). Neither worked in the 7800, and the Xevious one told me why it didn’t work: It said unencrypted (which was technically un-signed, but that’s what we called it back in 1984).

I did some research, it turns out nobody uses EPROMS anymore, and most non-volatile memory in modern electronics use flash. Back in the old days we had a very expensive Data I/O gang programmer, and even on ebay these days, they are still quite expensive. Fortunately there’s lots of interest in vintage electronics (everything from old home computers to old engine computers) There is (of course) a chinese company that makes a relatively inexpensive line of programmers called Xgecu. Unfortunately, using them requires you to use a somewhat suspicious Chinese download program that only works on Windows. I’m a Mac and Linux guy these days so that wasn’t going to fly. I did find out that two of the older models that they make were reverse engineered by David Griffith and he wrote an open source command line utility called minipro https://gitlab.com/DavidGriffith/minipro.

TL866II+

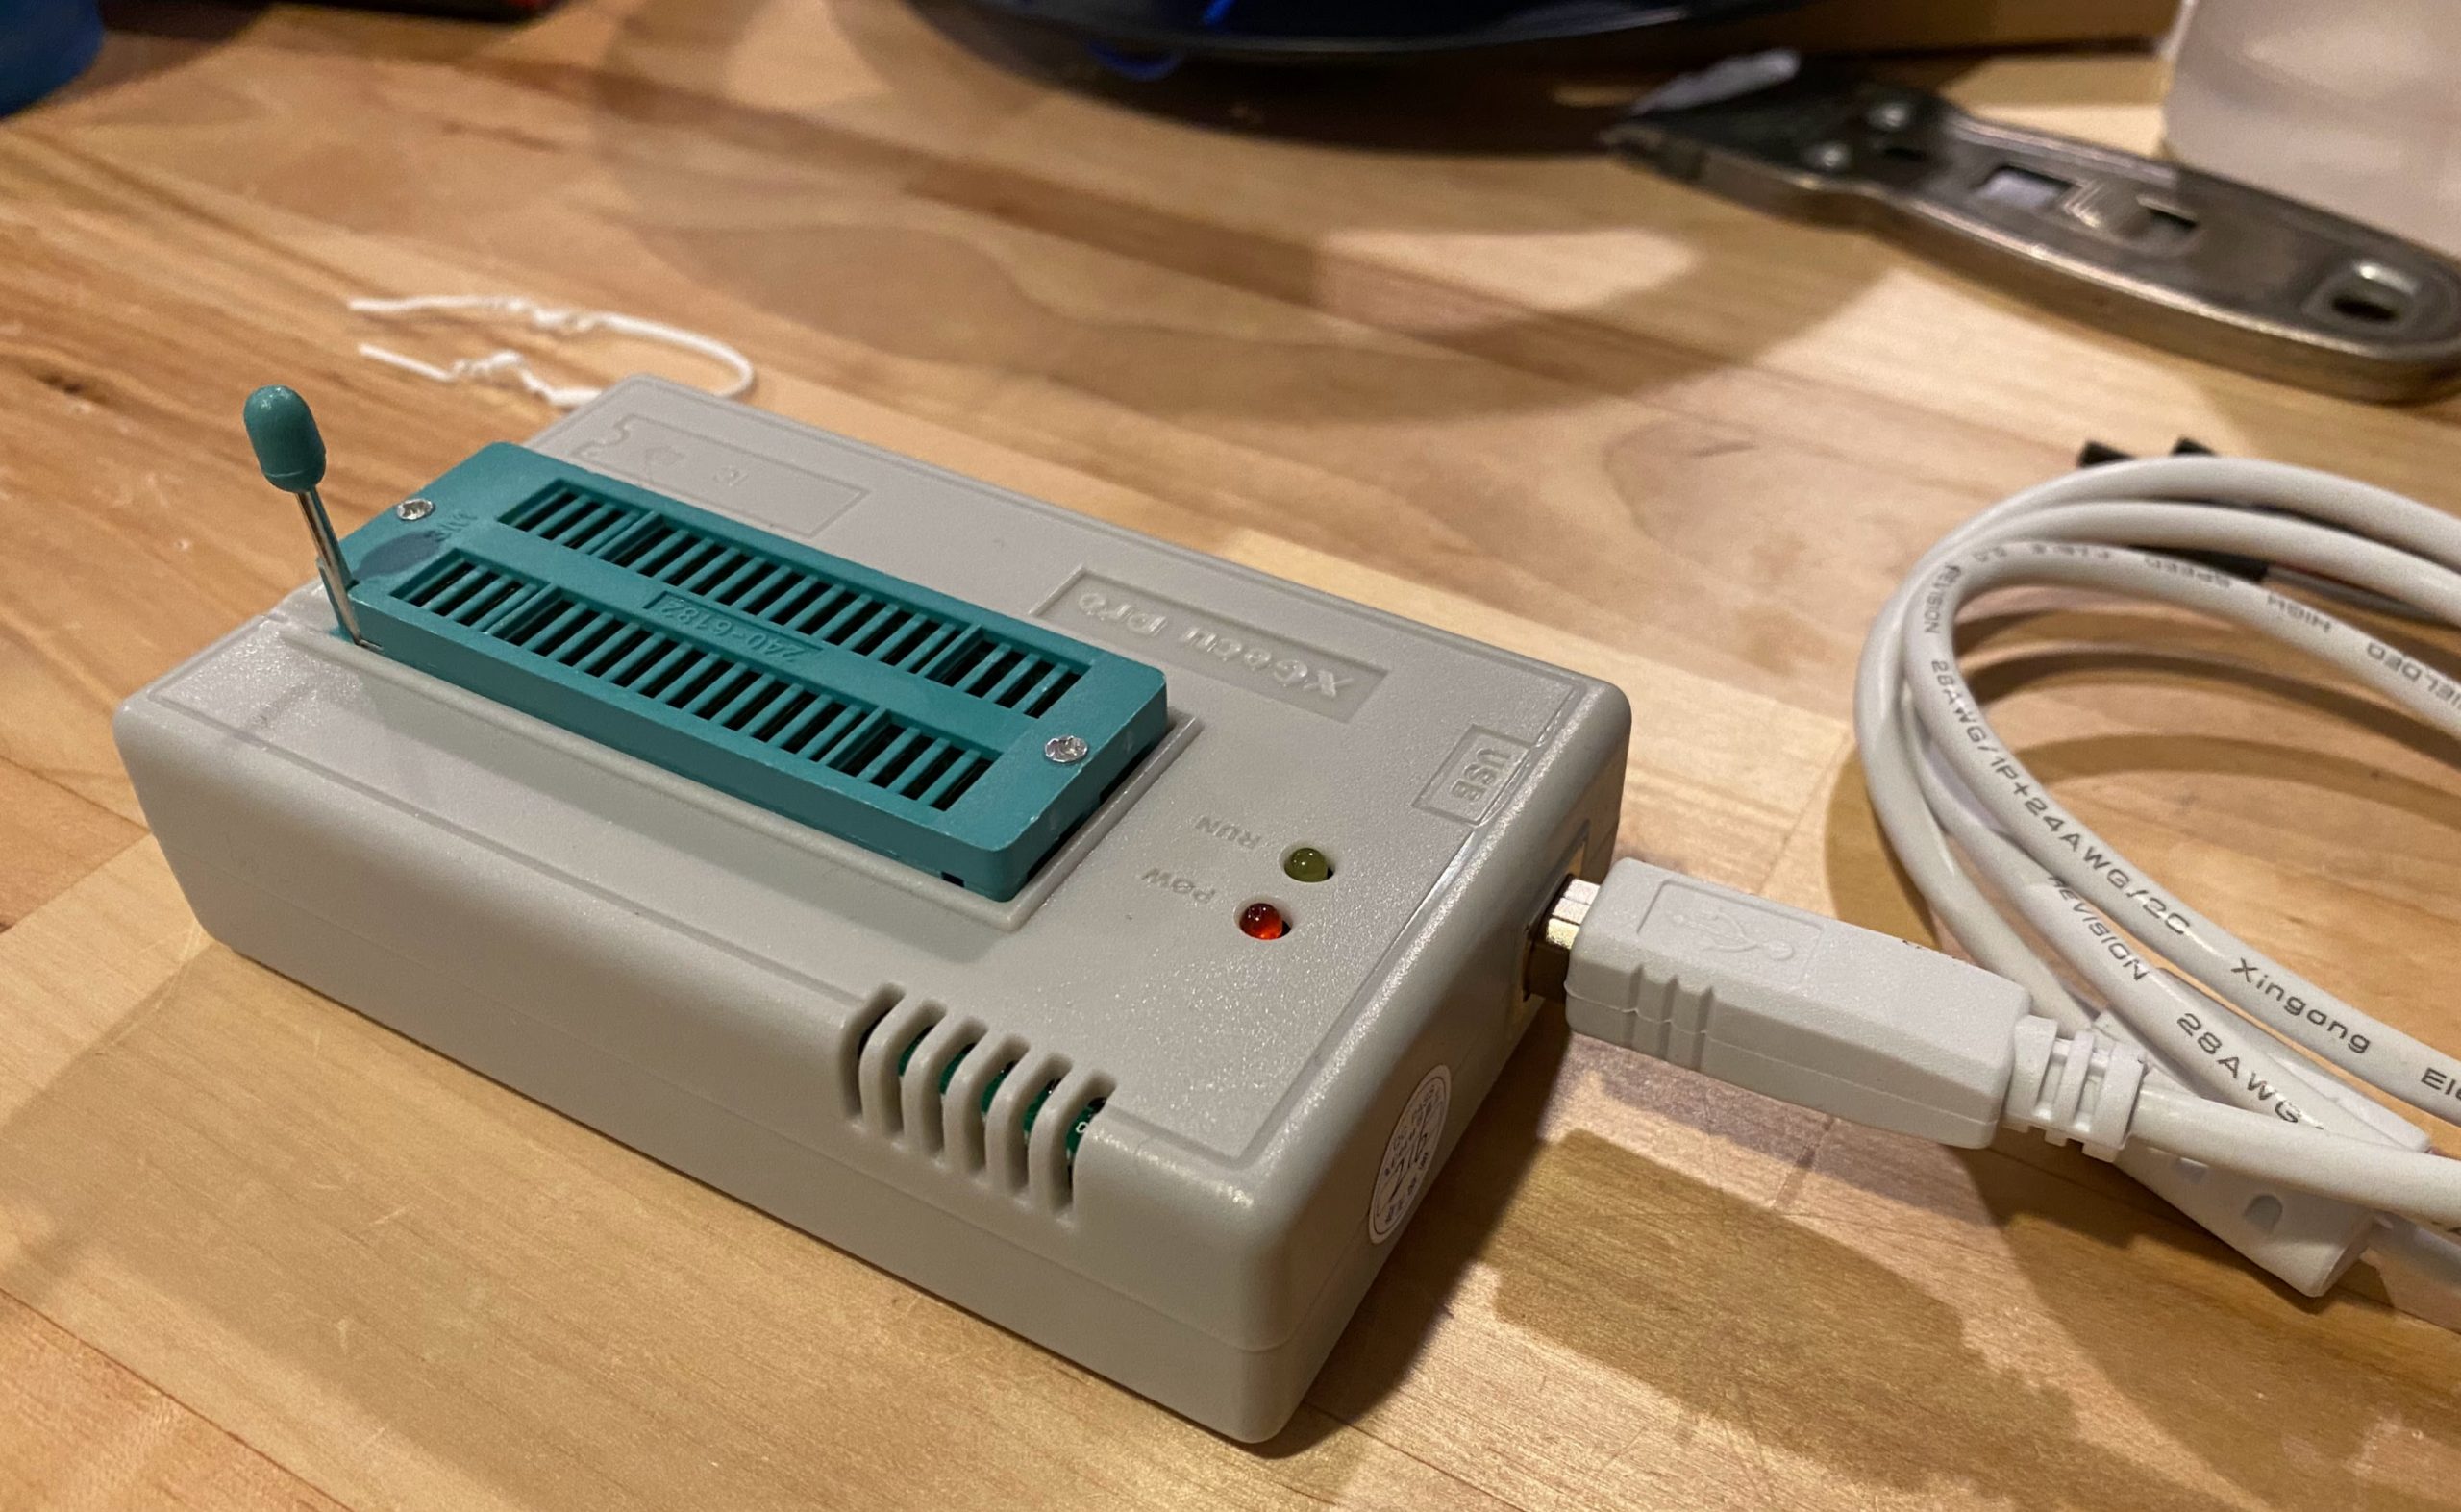
Unfortunately the current shipping version of the Xgecu programmers aren’t supported by minipro (Conversations I found online indicate that David tried but ran into difficulties because the manufacturer was actively trying to keep people from finding out how it works. I searched and found that Jameco was still selling the TL866II+. It was a little more expensive than the very few chinese sellers I found that carried it, but I was impatient and ordered it from Jameco (besides, Jameco is grate for a lot of cool stuff!) I got it in a few days and I was able to read out the EPROMS from my development carts.

It took a little research (a topic for another post) but I figured. out how to assemble the bits from the EPROMs into a form that was playable by the modern Atari 7800 emulator A7800. Most of the games played, including my two “unplayable” games (The emulator doesn’t check the signature). I didn’t check all of them, but a few I did a binary comparison with downloads of the release ROMS and they were identical.

My first problem, I didn’t have any blank EPROMS and I didn’t have an EPROM eraser. EPROMS use strong, short wavelength. (250nm) UV light. I tried a UV lamp I have used for “retrobrighting” old plastics, as well as a UV flashlight, but no luck. I wondered if one of the many phone “sanitizers” that became popular during the pandemic would work. It turns out there are junk ones, (using LEDS) and good ones (with real tubes) and the good ones are pretty expensive new, but it turns out there are lots of these on Facebook Marketplace, and I was able to get the “Phone Soap” UV sanitizer for a really good price.

With two tubes, you can also put eproms back to back and double up the capacity.

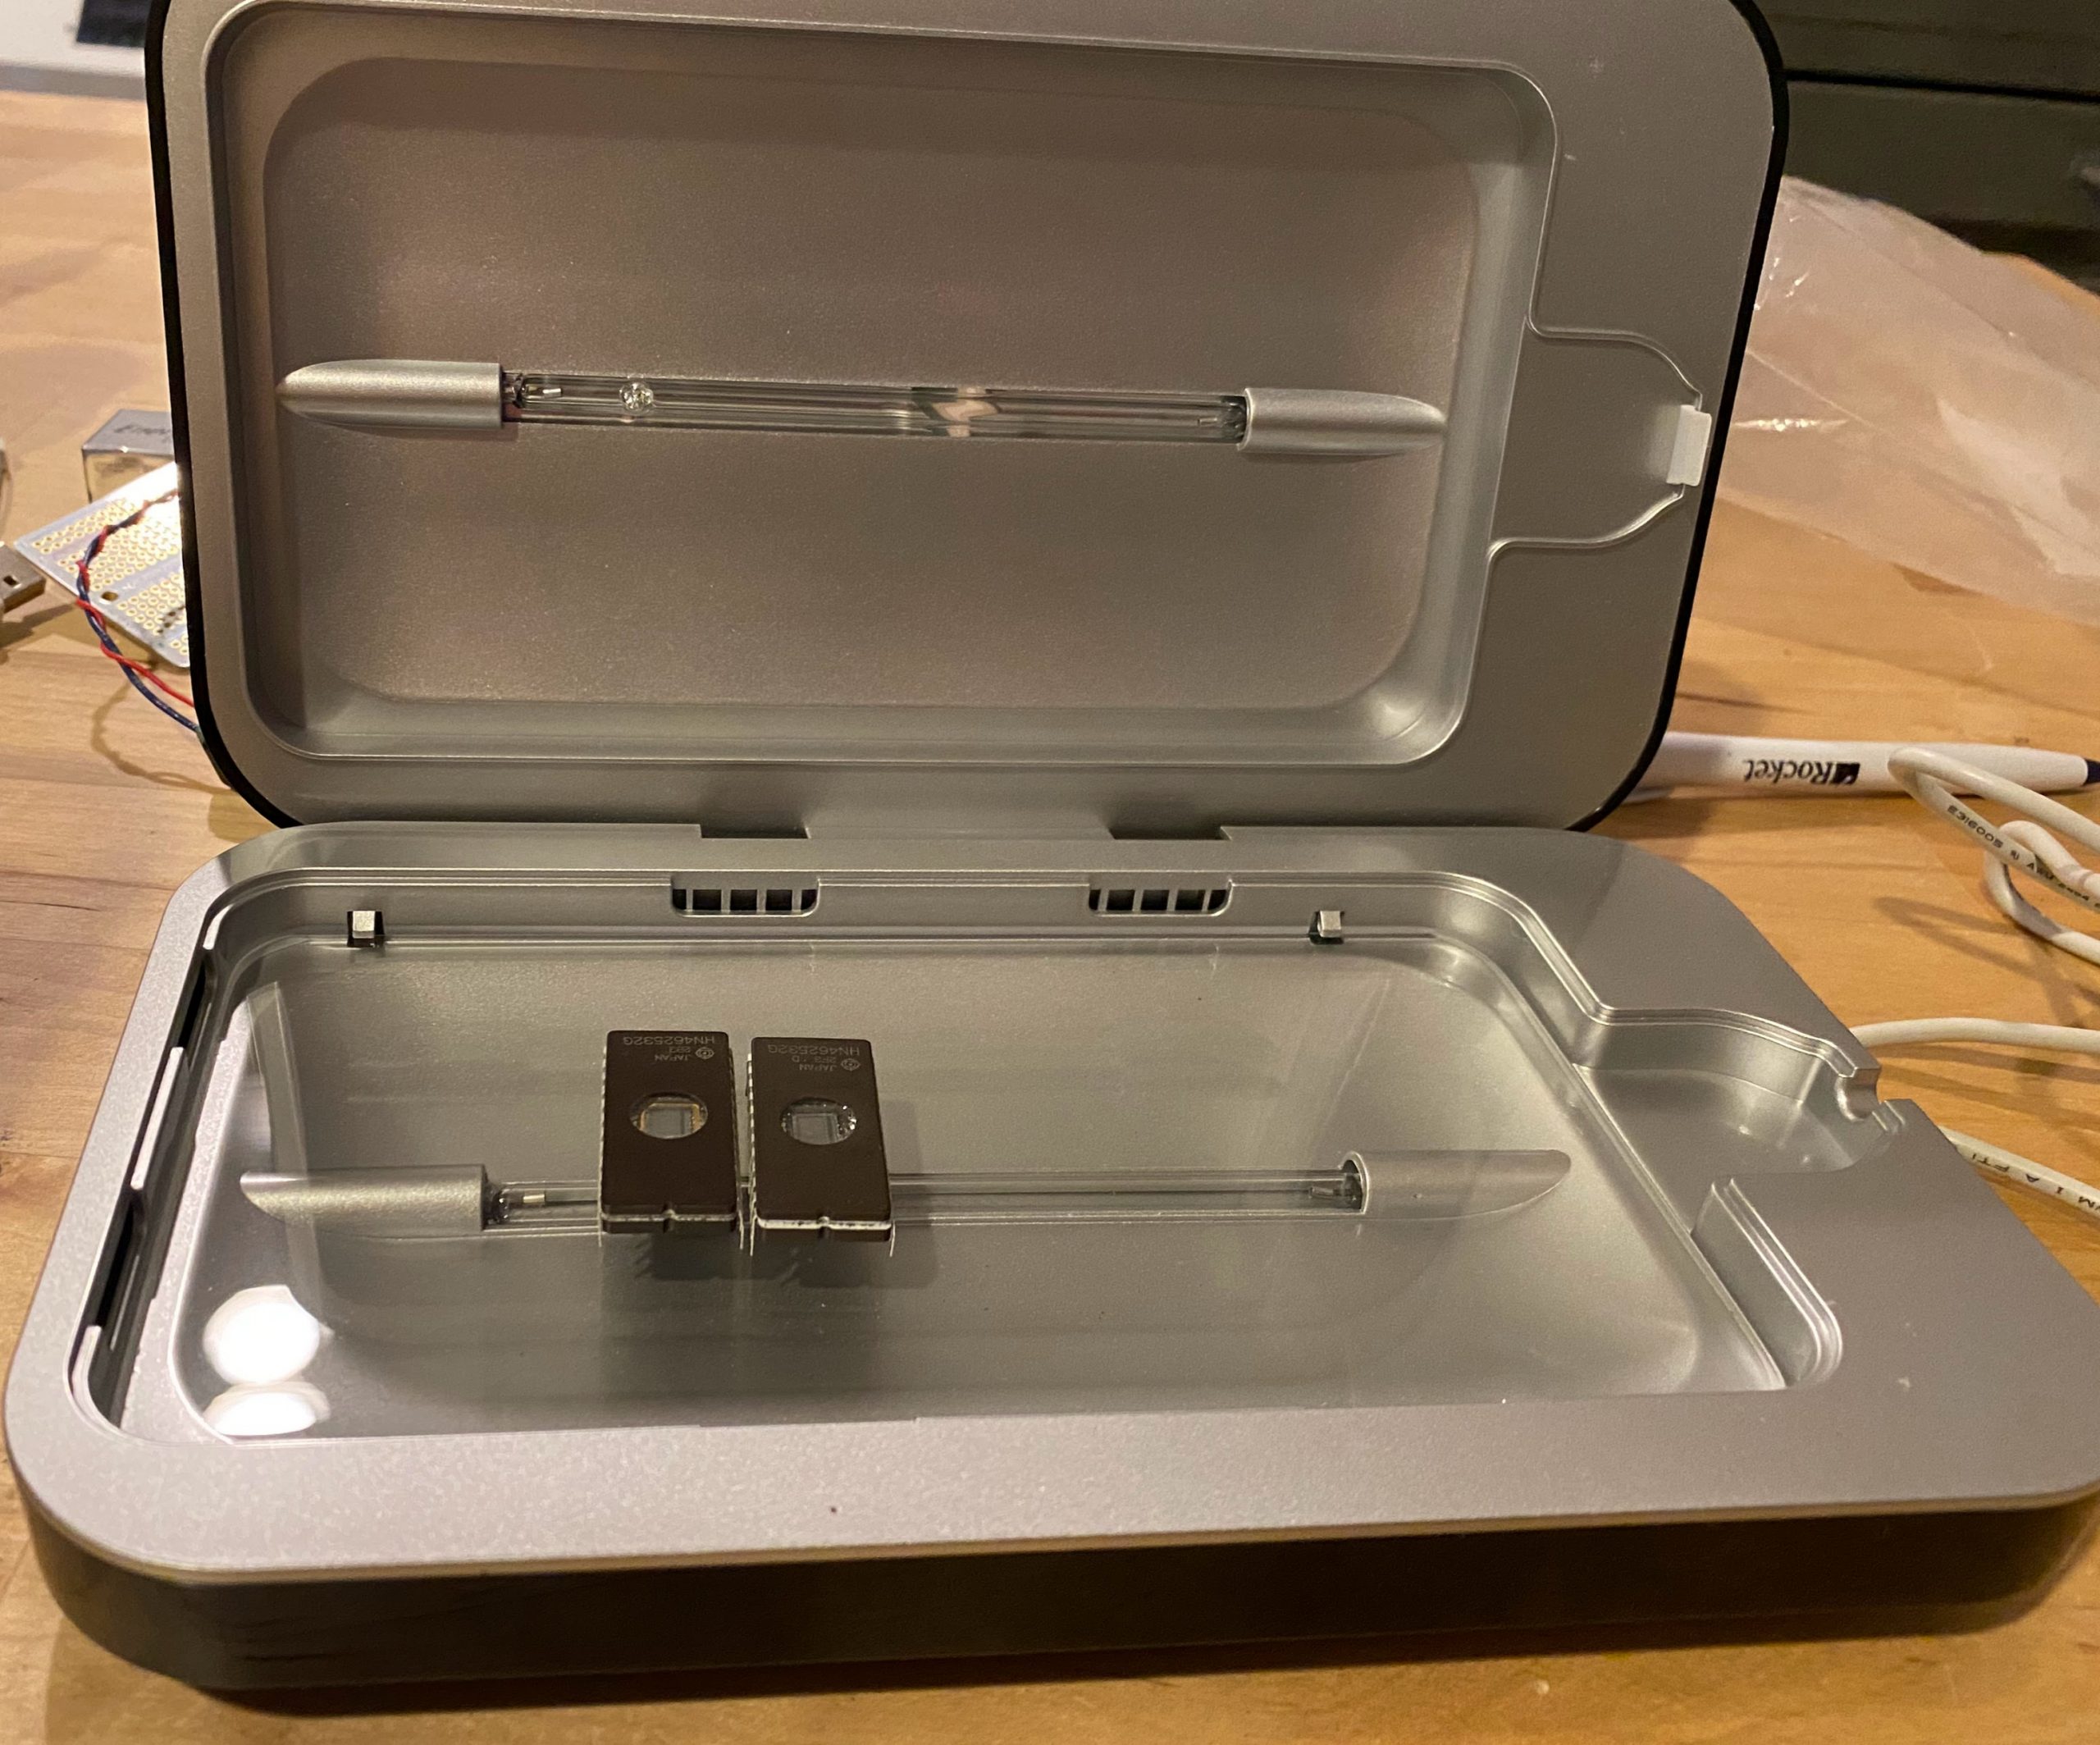
It totally wipes the EPROMS in it’s normal 10 minute cycle!

Using the a7800basic/7800sign command, I was able to verify that the Robotron and Xevious ROMS were unsigned, I signed them and was able to burn the Xevious ROMS and play them on the actual Atari 7800!’

It turns. out, I got lucky. I started trying to burn the robotron ROMs and I got lucky again with the first one, but all the rest Failed to verify after only writing one or two bytes. I thought, maybe they are just old and tired, I tried putting them through the eraser multiple cycles, and still fail. I ordered some new blank ones from Jameco, and they all had the same error!

Time to hit the datasheet

I noticed that the programmer reported the pulse time , VCC, VPP and VDD voltages for programming.
It was reporting VCC, VDD = 5V, VPP=18V and pulse time 200 ms. The first thing I noticed was that the datasheet says 50 ms for the programming pulse, and I tried changing that parameter, no luck. It also said VPP = 21 V and NO DICE! that voltage wasn’t available on the TL866II+ ! (note, that if you look at the same part number from different manufacturers, there are a wide range of acceptable voltages.)

I wondered if you could separately apply that programming voltage or if it needed to be in step with the pulses. The second would definitely be possible, but in terms of time, it might be cheaper to try to find another programmer (the older model could go to 21 V).

I bent out the VPP pin and stuck a wire in with the gnd pin and applied 21V with my bench power supply.

It worked!

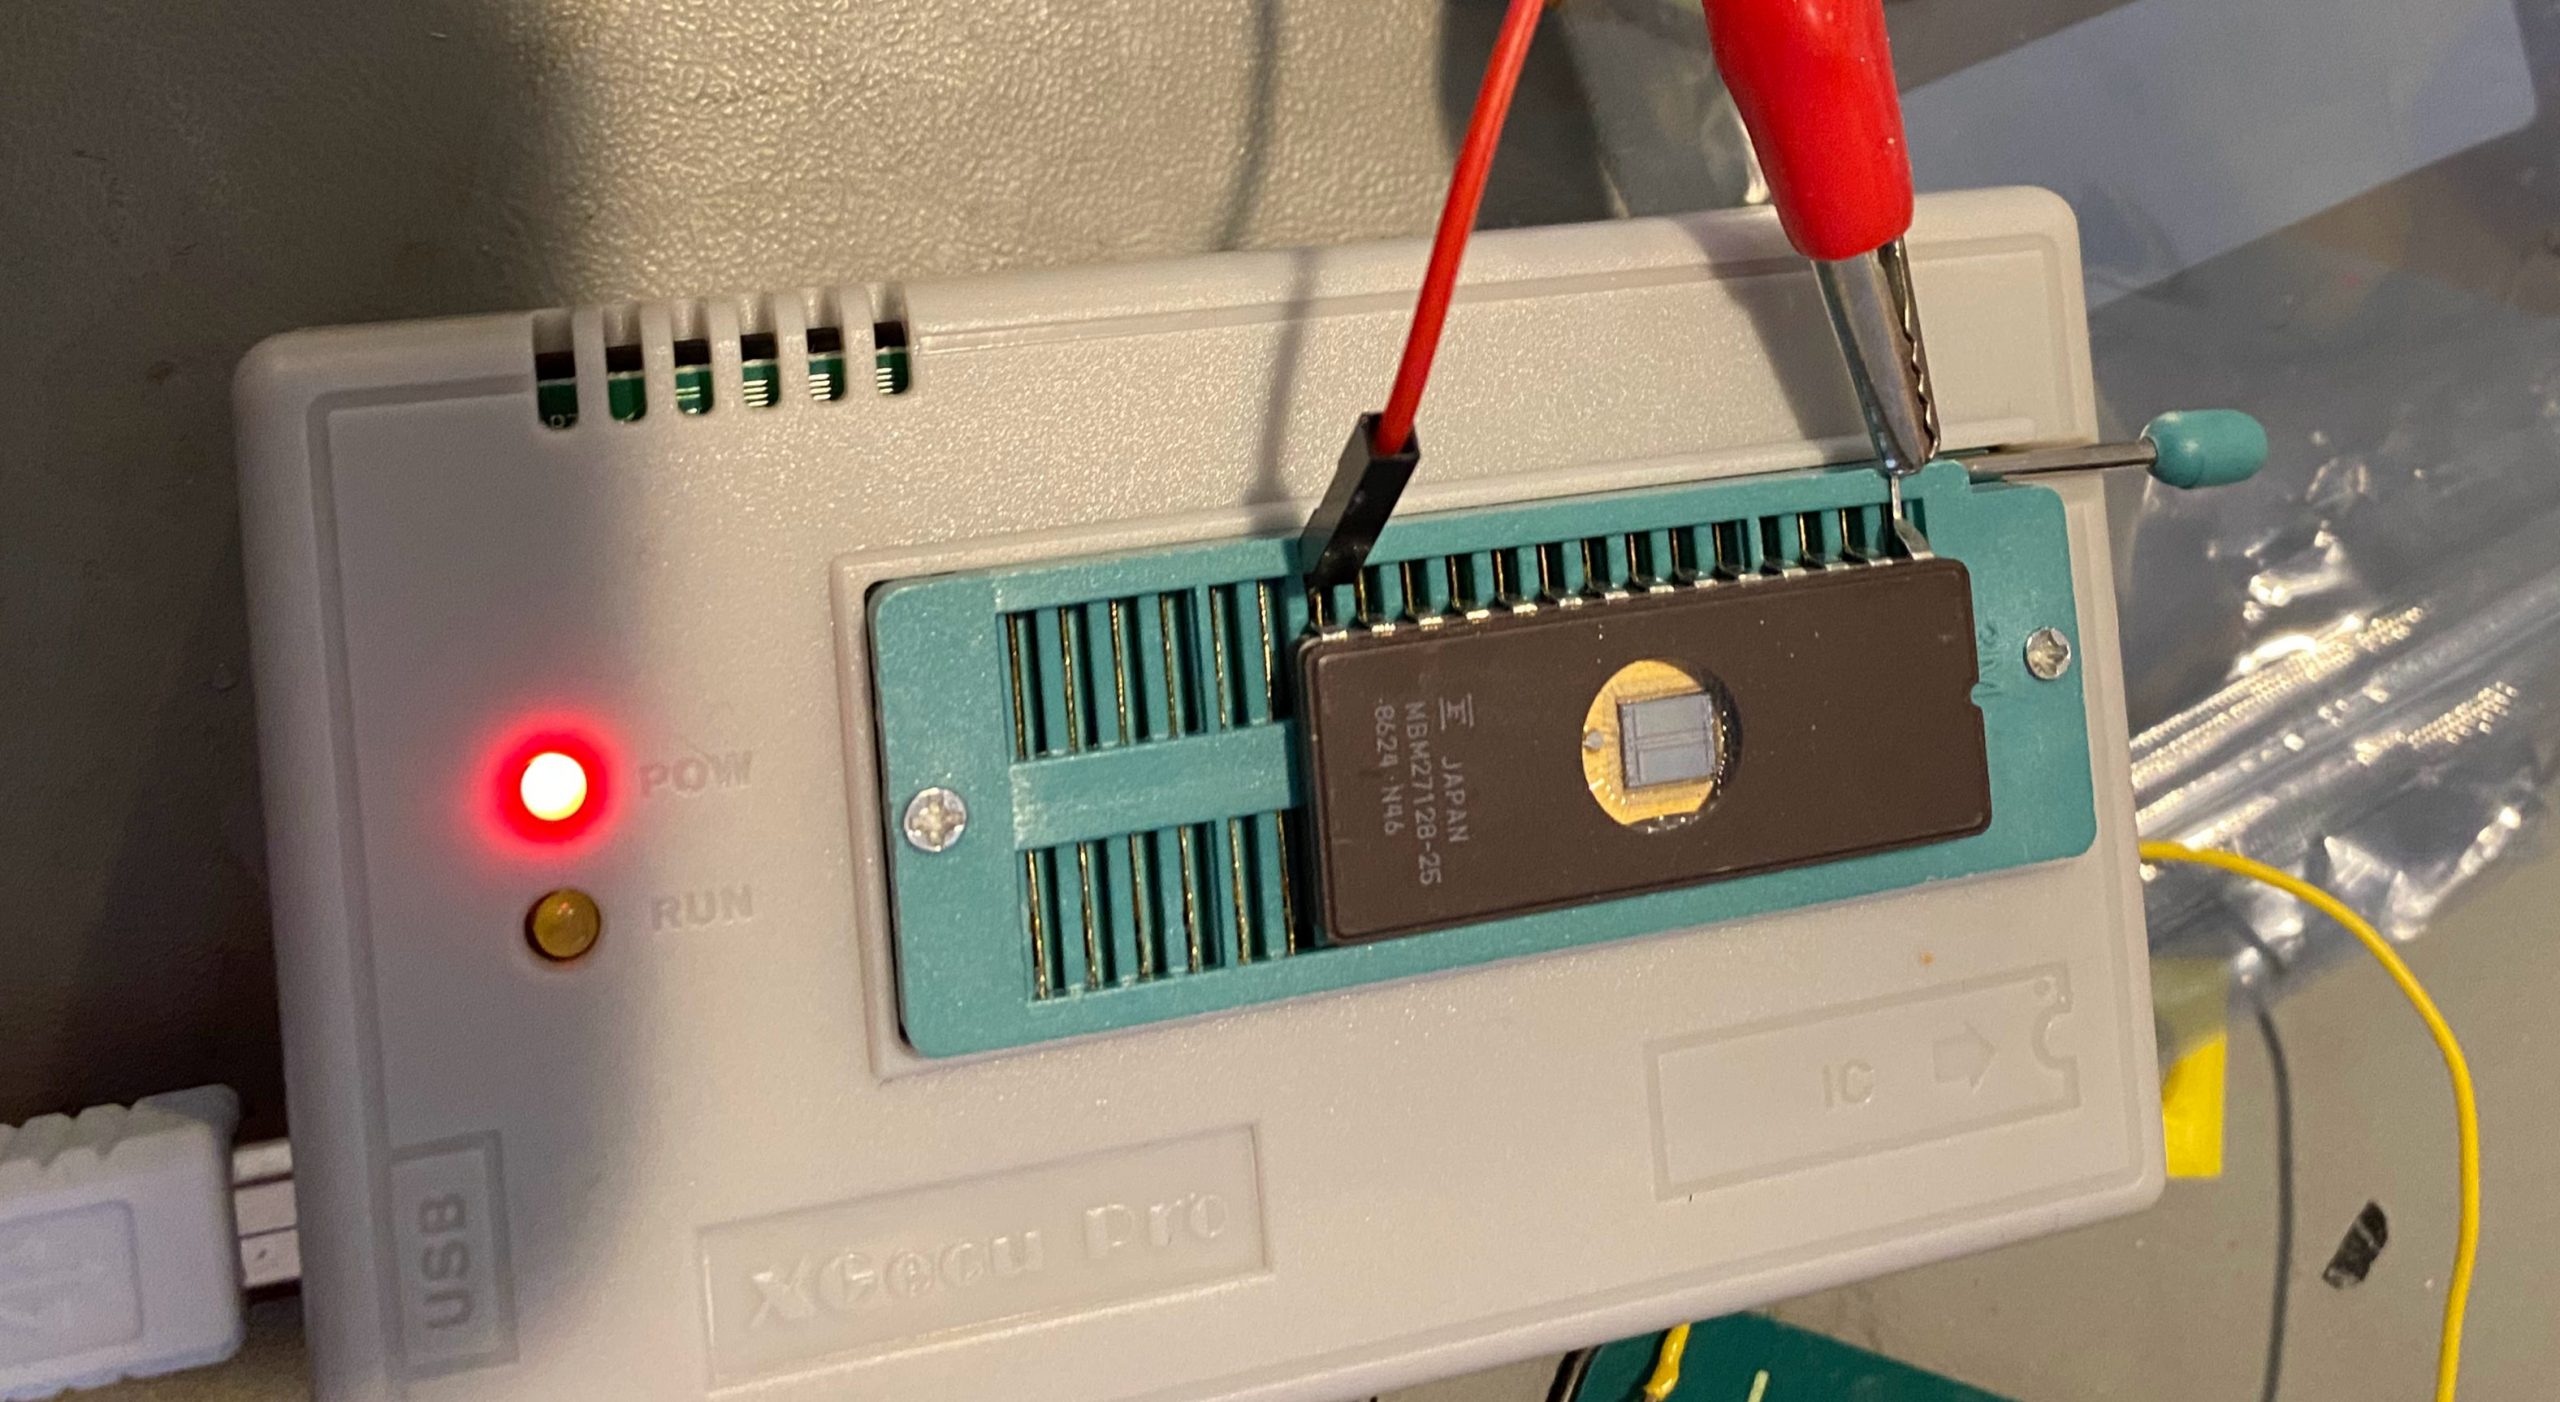
It worked, but bending the pin would not be a strategy I could use very many times. I ordered some ZIF sockets, but as you know, I’m impatient, so I found a 28 pin (narrow) socket, and cut it in half and soldered it up on an adafruit perma proto board.

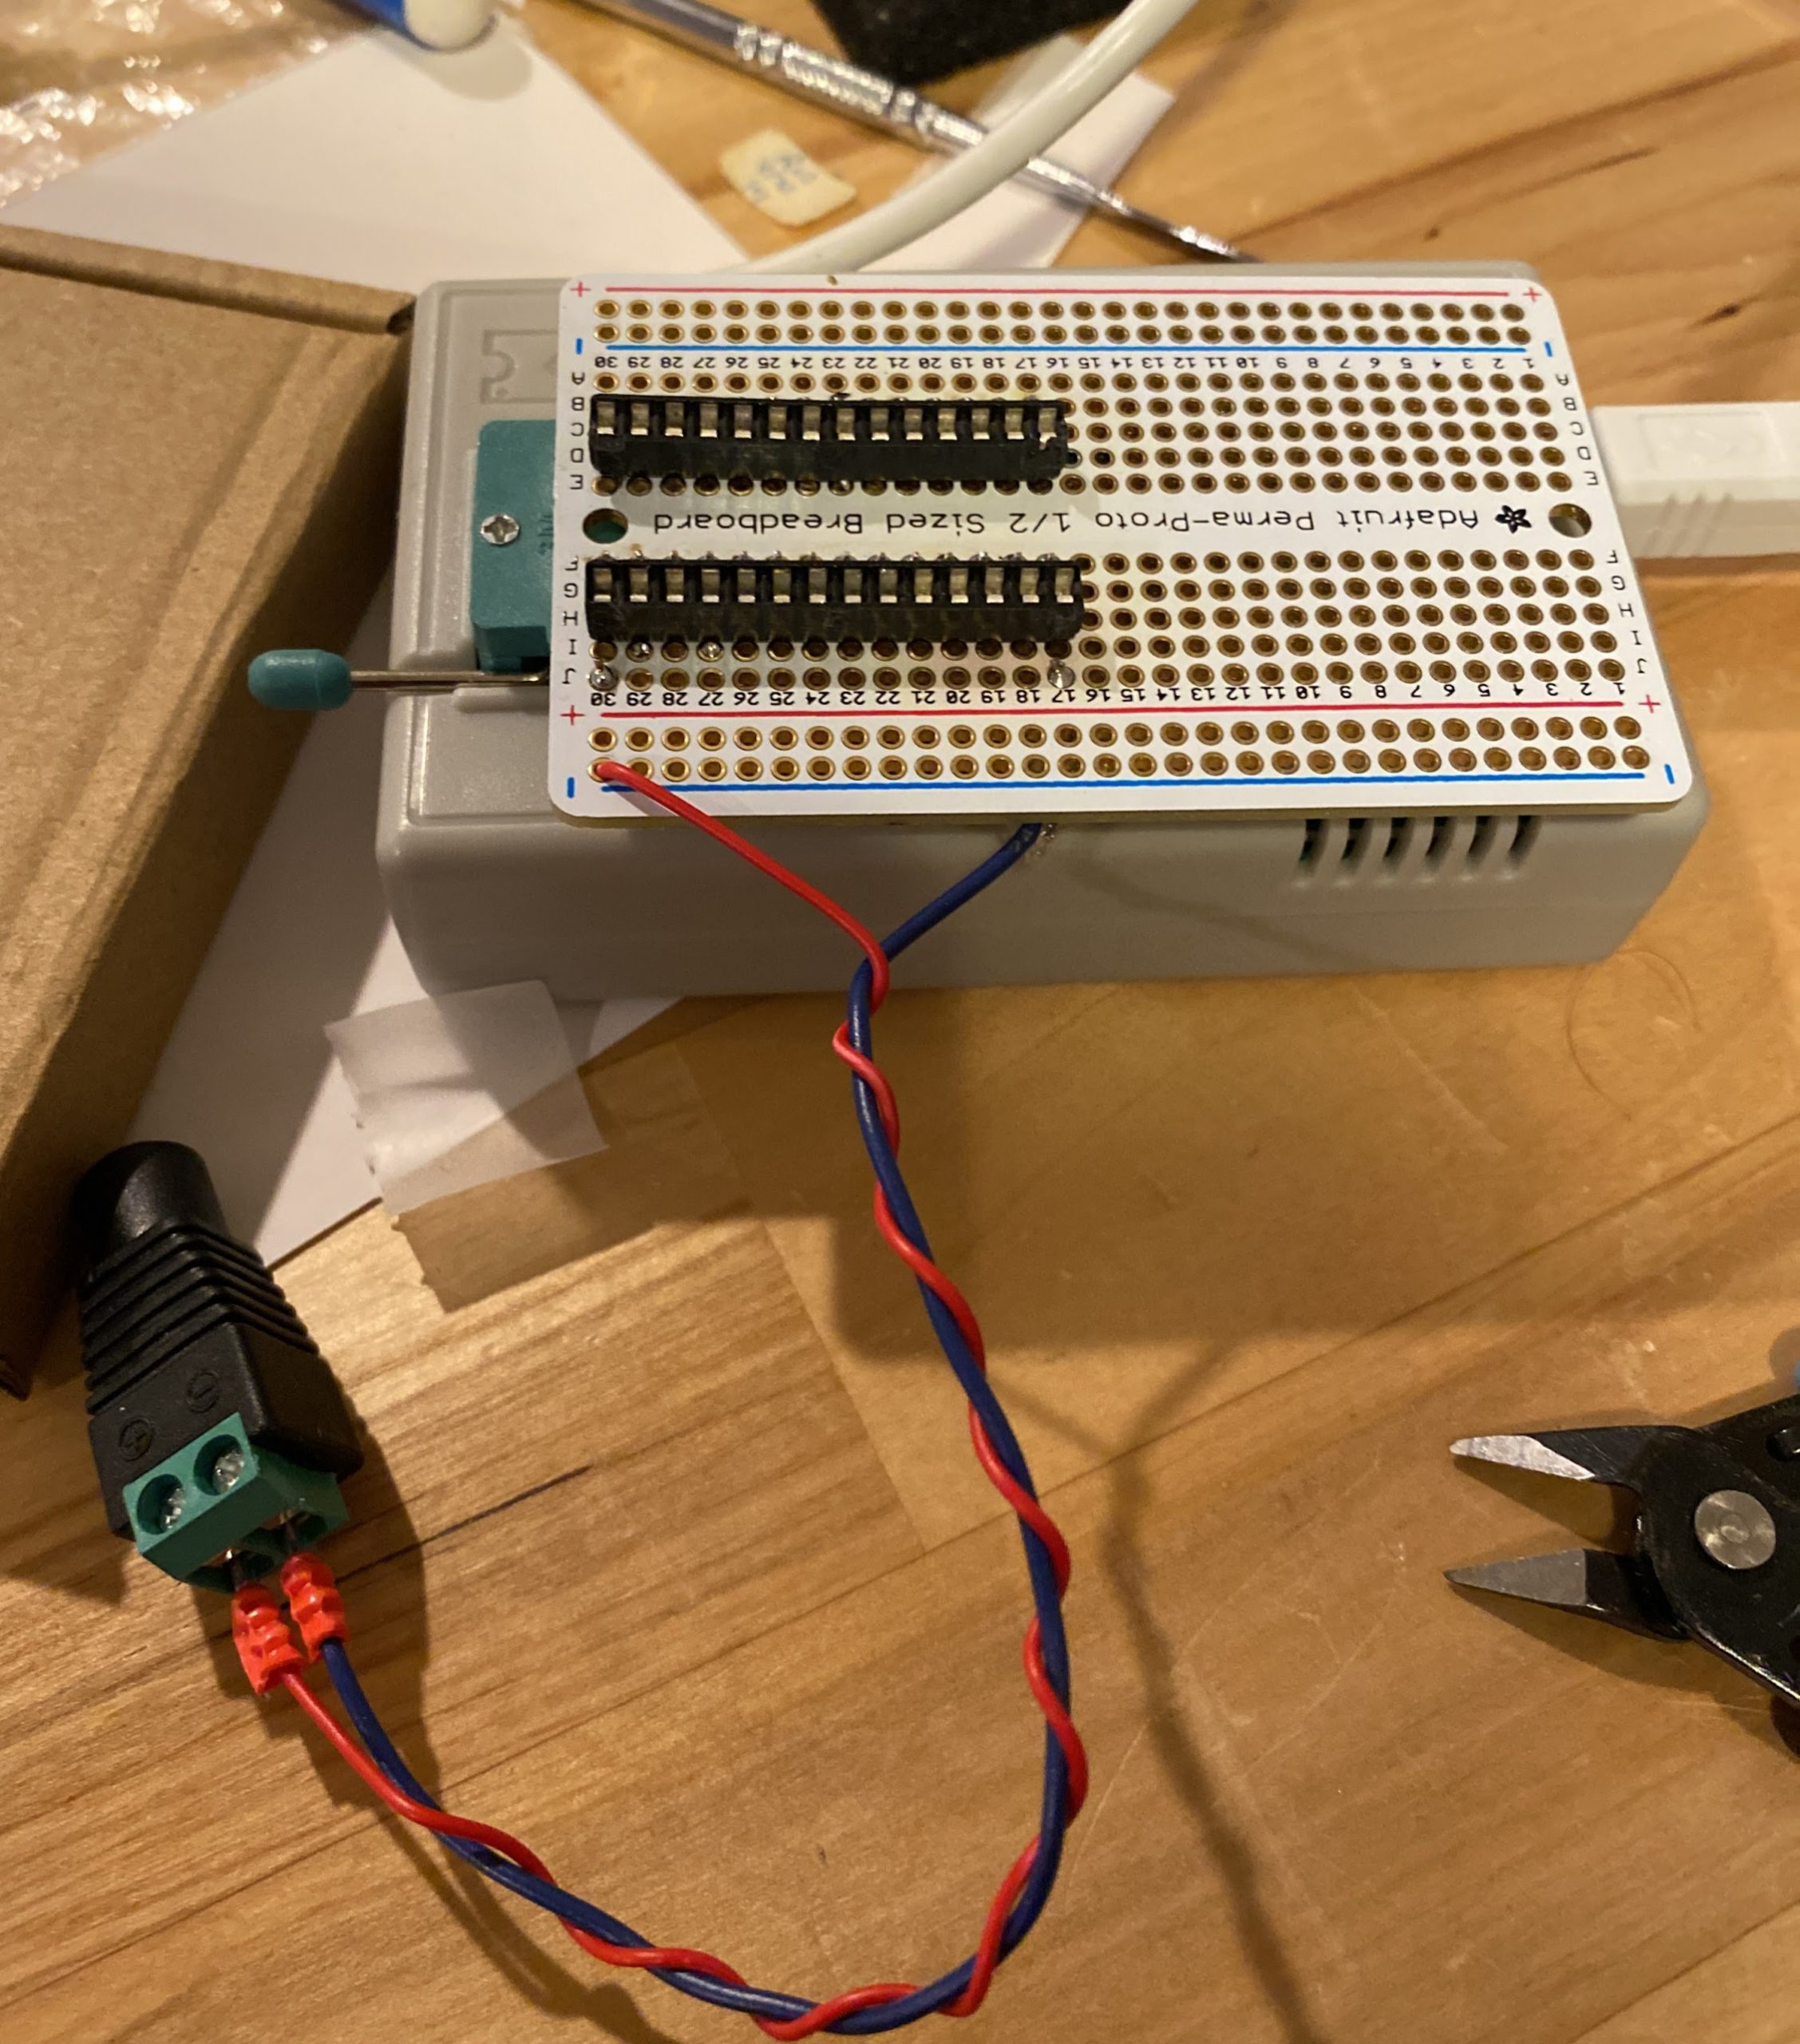
It works very reliably! I was finally able to burn the Robotron roms and play them!

Flexible Wifi Doorbell

A long, long time ago, we moved a door from our kitchen to the hall, and in the process, our doorbell was moved into the basement stairs. We can barely hear it on the first floor, and I spend most of my days on the third.

I know I could buy an Internet doorbell, or a simple wireless doorbell, but I really liked the idea of being able to tap into any events, and keeping all the data in my own network.

I bought a 433 MHz doorbell that I knew someone else had controlled from an Arduino (I’d normally give credit, but I lost the reference). I didn’t want potential network failures to keep the regular doorbell from working, so I decided to always trigger a relay and send the wireless doorbell code, while informing a messaging server of the events. This MVP is great because it improves my doorbell situation while providing lots of room for growth, such as triggering future security cameras, sending messages etc.

433 MHz Doorbells

433Mhz RF Decoder Transmitter With Receiver Module Kit For ARM MCU Wireless  Geek - US$2.99

There are some very cheap 433 MHz transmitter/receiver pairs (<$5) that are compatible with a lot of the wireless doorbells. I ended up using the RC-Switch library (available from the library manager). It’s also supported by the RadioHead library.

You only need the receiver to decode the transmission from the doorbell’s pushbutton. I just hooked it up to an Arduino Uno and ran one of the receive example sketches. You might get several different “packets’ with different codes, but one of them is the right one. Hook up the transmitter, and transmit the codes one at a time until one of them works.

Here you see a rough prototype with a switch standing in for the doorbell button.

Next post we’ll pretty it up, and show some code!

Wyostat: Open Source Thermostat Pt. 1

Does the world need another connected thermostat?

When my thermostat went on the blink last winter, I looked at Nest, and Ecobee, and the other me-too thermostats, and I decided I would rather build my own.

  1. If Nest goes out of business (or even more likely, Google decides to go a different direction),  all that cool connected functionality pffft!
  2. If I want to control it just inside my house, I don’t really have that option.
  3. Some of the connected thermostats also offer remote sensors, behavior learning, etc. but they are expensive, and you have no control.
  4. I have a two wire system. While some of the connected thermostats do power stealing (Nest), I wanted more powering options.
  5. I’ve been playing with ESP32’s and I’ve found them powerful and cheap!

Prototyping

Most home hvac systems run on 24VAC. When I moved in to my house, it had one of those classic round bun thermostats that tilt a mercury switch with a bimetallic spiral. More modern systems have an additional C wire for power (and separate fan  and cool wire). This meant that I would be powering the thermostat externally. A little googling and I found this info on thermostat wiring:

I found a triac board offered by another maker and open source enthusiast:
http://makeatronics.blogspot.com/2013/06/24v-ac-solid-state-relay-board.html


It features three triac channels with Opto-isolated inputs. The control signals seem to work at 5V or 3.3V.

For the controller I found a dev board with an ESP32 module, SiLabs usb controller, and a small monochrome OLED display. It’s sold as Wemos Lolin, and it has a Wemos-like logo on the back. it’s actually a clone of a D-Duino-32 by Travis Lin.

I mounted it on top of the triac board, with a laser cut plate to mount the same as my existing thermostat.

I used a Sparkfun TMP102 as the temperature sensor. I floated it to keep it off the cold wall. Figured I’d mount it in a case later. It worked great! The next installment will cover the PCB design and debugging. The code and the EDA files are at: https://github.com/wyolum/wyostat

Yogurt Science Style!

Ok, If you only come here for electronics, and 3D printing, look away, but my love of making also extends to food, especially if it’s preparation involves science-y gadgets and biological processes. I’m a big fan of fermentation, and while I no longer brew beer, I regularly make fermented pickles, hot sauce, sauerkraut and …. Yogurt!

I’m known amongst my friends as a Sous Vide Evangelist, spreading the word of the best kitchen gadget ever: The Immersion circulator. I’ve cooked lots in it but it took a while for me to realize that it would be great for short term culturing of fermented foods. Yogurt is soo easy to make, and you can chose your favorite milk. I personally use High Lawn Farms Jersey Cow, Whole milk. High in protein, fat and deliciousness!

  1. Bag the milk in a ziplock bag. The cheap vacuum sealer I have is best for drier foods, so I just use a gallon freezer ziplock. Check it as they sometimes leak. Use either the water immersion method or edge of table to get most of the air out. If I’m careful, I can usually get a half gallon in the gallon bag.
  2. I forgot to take a picture of this step, but pre-heat your immersion bath to between 180 and 185F. Cook for 1 hour. This apparently changes some of the proteins and makes them more available for fermentation. When it’s done, I chill it by putting the bag in a bowl and pouring cold water on it, waiting until the water is warm, pour out and repeat. It should be warm to the touch but not hot. If you have an infrared thermometer, make sure it’s below 120F.
  3. Add 1/4 cup good plain yogurt with live culturesadd yogurt
    Purge the air again, and reseal. Squish around on the table a bit to disperse the wee beasties.
  4. Change the water (it’s too hot!) and reset the Immersion circulator for between 110 and 116F. I tend to use 112F.

    Let it ferment for 6 hours or more. I generally stop at 6 hours. Longer is more sour if you like it that way.
  5. When it’s done, you’ll see lots of solids and separate whey.

    You can just re-mix it up at this point if you like more runny yogurt. I generally try to pour off as much whey as I can (save it, more on this in another post). This makes it more “greek like” though I don’t go crazy and strain it through cheese cloth. I just pour as much out of the bag as I can.
  6. Whisk or use an electric mixer to smooth it out. It is a little lumpier than commercial yogurt, but once you try it, there’s no going back.


Holiday Ornament Design Challenge

Over the Holiday break, I challenged my family to design some ornaments for our tree. So far, only Mason (17 year old son) rose to the challenge, and I think he did very well indeed.

He did the designs in OpenSCAD, and at first hardcoded all the measurements until I encouraged him to make the designs fully parametric. This piece was designed to accept a light (from the string lights on the tree) in the bottom. Printed in Natural PLA with about 15% fill, giving it a kindof stripey, plaid texture.

This was printed without support on the Ultimaker 3. The very inside top is a little stringy, but hardly noticeable, and very easy to clean up.

The second design was really the first one he did, and isn’t fully parametric. You’ll have to scale it in your slicer, but it turned out pretty nice.

I printed it in white, thinking it might be fun to use a sharpie to color in the facets. This was printed with the PVA support.
I also printed it in transparent ColorFabb XT. I had a problem with the wipe tower, so the top was a bit messed up with mixed PVA and XT, which broke off, but a light fit into it, and I think it looks nice.

I encourage you to sit down and design with your family this holiday. You can get the sources for these at: http://github.com/osbock/HolidayOrnaments. Feel free to do some Pull requests to add your own designs!

For younger, or less mathematically inclined designers, I recommend Tinkercad.com, or I’m sure there are cool Ipad apps out there. Let me know if you have a favorite!

Building Access Security Research

I’ve been researching a lot of contactless payment, and authentication stuff for work, and thought I’d share some of the most interesting links. This post will focus on building access.

Building access

It seems like many building access keycard systems are pretty weak in terms of security. Essentially, many of them present an ID code that is checked against a database. If you can copy that code you can clone the card (replay attack). Also most of them use something called Wiegand signalling as their output which is just a protocol to decode, so if you can tap in, you can sniff or inject stuff pretty easily. There are more secure systems out there that use a cryptographic exchange, but the insecure systems are in abundance!

getksi.com blog — This is a company that sells a more secure building access system, so they’ve done a lot of competitive research about vulnerabilities of common building access systems.

bishopfox.com — Security consulting firm. hacked a long range reader to steal ID’s. Essentially used an arduino to listen in on the Wiegand output.

Jonathan Westhues — EE and software guy did a lot of reverse engineering of some badge signals, later created a whole platform for reading and spoofing badges.

Lasercast Activate!

I recently got my thumb reconstructed (due to Osteo arthritis). And my new cast felt like it could use an upgrade. Laser! I figure it will be a good addition to my mad scientist costume for Halloween. Chinese laser pointer from ebay or aliexpress (don’t remember, I have a drawer full of laser modules). Adafruit powerboost 500 basic (If I’d had the full one, it could charge too, but this is what I had lying around).  I designed a very basic platform in OpenSCAD, and stuck the board down with mounting tape. The enable switch is soldered directly to the board (I cut off one of the terminals.)

Both the laser platform and the activation button are mounted with Velcro (the cast is coming off…) the button is superglued to the disk that holds the velcro dot.

If you want to make it, it’s very likely that your laser module will be sized differently so edit the openSCAD file to  fit.

3D printed circle the same size as a velcro dot

First Video, and a few Quadcopter lessons learned

I had a lot of fun flying the 3DR Solo in the last couple of weeks, but after a while you just want to DO something. Until I develop my “copilot” add on board to activate some cool add ons and sensors, photography is the obvious thing, and my bundle even came with the stabilization gimbal. I was planning on buying a “fauxpro” from MCM electronics but found out the gimbal is really “locked” in to Genuine GoPro ™. I could probably hack it, but the biggest advantage of using a real GoPro is the expansion connector on the back allows you to start and stop video, take pics etc. from the remote. So I gritted my teeth and plunked down $250 at Costco.com on a GoPro Hero4 bundle that included an extra battery and SD card.

Here’s my first flight video:

I’m very pleased with the video (shot at 1080p and 60 fps) though obviously, my control and shot planning skills need some work.

Shortly after this, I crashed and trashed 4 propellers (ouch$). I was running it on “cable cam” where you fly to different positions, record them and then you can run the quadcopter between those positions like it was on a cable. When I ran it to the end of the “Cable” it ended up being about 5 feet higher than when it started, got tangled in some wires, and crashed upside down. It sat there and ground the propellers to dust, as I didn’t know how to turn off the motors until it detected the crash (maybe a minute later).

Lesson Learned: Don’t expect GPS to get you exactly to a spot (it’s only good +- 3 meters at best) and don’t fly in a confined airspace unless you are really good and manually controlling it!

Other Lesson Learned: RTFM, except there was no FM! Well, online there is, and a quick web search revealed holding down a and b buttons together will cause an emergency motor stop.

3DR Solo of my very own!

If you’ve followed this blog, you know I’ve played with toy quadcopters and built one from parts. I’ve also built an FPV racing drone that I’ve only successfully flown twice.

For a long time I’ve lusted after a GPS drone capable of autopilot, especially after a demo by a neighborhood friend of his DJI Phantom 3. I think the DJI drones are pretty cool, but I hate that they are not open, and being both an Open Hardware guy, and never satisfied with factory settings, I really wanted open source.

3D Robotics, founded by former Wired editor Chris Anderson has been making open source autopilot drones for quite a while now, but they’ve been quite pricey, and don’t include a camera. I just couldn’t justify it.

My friend Michael Castor at  http://www.mcmelectronics.com/ clued me in to a sale at Bestbuy and I scooped up a Solo, extra battery, gimbal, extra propellers, and a backpack for $399 (plus tax). SCORE!

Note, last time I checked, the price just went up to $599, but you can still get the Solo for $399

Free 2 day shipping said it would be here Thursday, but the Solo came on Wednesday, and the rest on Thursday.

solo box

It was well packed, comes with battery, two extra propellers, transmitter,  and chargers for the transmitter and the battery. It comes with an eggcrate material carrying case that would probably do for a while, but I hate to think what would happen when it rains.

The backpack, which came later (and I may cover in a future post) is terrific."carrying case"

DJI, by the way also gives you “carrying case” packing, but in their case close cell foam, which would probably hold up longer.

Solo unboxing

Setting it up was pretty easy, download the app to my phone, power everything up. There’s a required firmware update before flying, and while it crashed my phone a couple times (I am suspicious because I have CyanogenMod) it took only about 2 minutes.

I don’t have a camera yet (I’m waiting for a new model of “fauxpro” from mcm electronics.) but It was amazing that I actually managed to work all week without flying. A quick stop at the FAA site to register, print a label for my Solo, then I did get out on Saturday, and I’m hooked!

Kevin flying his new Solo
Photo by Will Caldico0tt

Auto take off and landing are the bomb! The orbit mode was pretty easy to use, once I figured out how to set the center on my tiny phone screen. I ordered an acer tablet from ebay (about $70) and hope that will be better.

3DR recommends initial flights in a wide open area, and I concur. While it’s really easy to fly, it’s also hard to judge depth at distance when it’s flying near trees etc. The next day, I did manage to crash it, breaking 2 propellers, and chipping a third. The Solo was fine though, and shut itself down with the remote talking to me “Crash detected”.

Hacking potential

I wouldn’t have even spent $400 (and will likely spend even more) if it wasn’t easy to add my own hardware and software mods. 3DR makes this really easy, with a well thought out Dev kit python API, and well documented hardware expansion. Check it all out at: https://dev.3dr.com/index.html

What makes this really exciting, is the Solo (in spite of the name) actually has Two processors, a pixhawk flight controller, and a linux based computer. You can actually ssh to the drone, and store scripts for execution during flight.

I’m excited that you can even use OpenCV on the video stream from the camera.

Arduino Robot Class preview

I’m teaching an Arduino Robot class June 29 from 6-8pm at YouDoitElectronics in Needham, Ma. The cost is $99 and you get to take home the robot you build. I’ll show you how to use an Arduino to control DC motors, and read sensors to react to the environment. The robot we’re building will have a sonar sensor for distance, and two line detectors for following a line.
To register email your name phone number and number of participants to events@youdoitelectronics.com. Please include Arduino Robot Workshop in the subject line. You will receive a call back within 1-2 business days. Fee is required at time of registration prior to the start of the workshop. Once registration and payment are complete a reservation confirmation number will secure your spot.