In late September, I led a workshop at the Duxbury Free library on making interactive Halloween displays, and more recently I set my project up on our porch for Halloween. One of the most effective ways to make your front porch scary and immersive is to pay attention to sound, and to make things move.
In this post, I’ll cover making sound, the next post will cover my moving ghost. There are lots of ways to make sound by control, and in reaction to people coming on to your porch. My original idea was to use a motion sensor, and then trigger an AC relay to turn on a cassette boombox. Because the boombox could have the mechanical play button pressed with the power off, when you turned the power on, it would play.
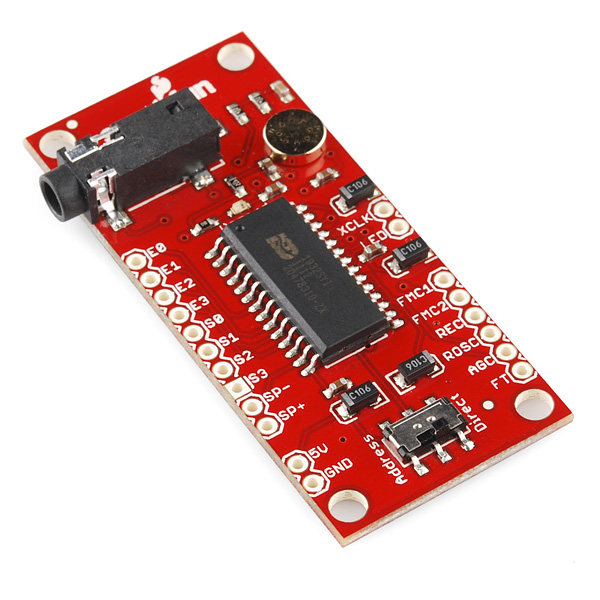
Then, I ran across the sparkfun voice recorder module at YouDoIt Electronics (my local hacker supply place!)
 There are other ways to make sound (and probably easier) but this was fun, and I’d already spent the money. If I had to do it over, I might use either the Adafruit wav shield, or a new entry, the very cheap Garan MP3 Module from Seeedstudio (I’m probably going to order one of these for next year!)
This breakout is for a chip that was originally meant for a voice recorder with some buttons to trigger the different segments. It’s not very well documented on the sparkfun site, but one of the comments pointed me to http://ianlangelectronic.webeden.co.uk/#/voice-recorder/4562321245. That with the datasheet, let me build a simple Arduino library to control it. You can download it from github here.
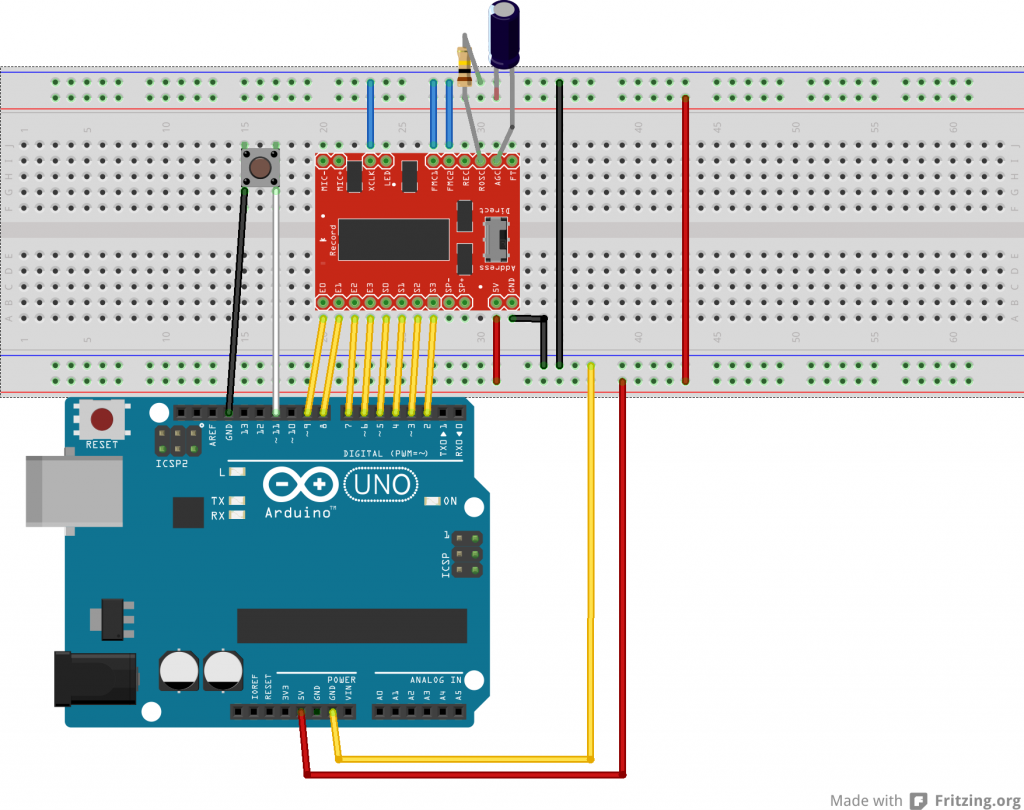
First you need to wire it up. Here’s a fritzing diagram showing the connections:

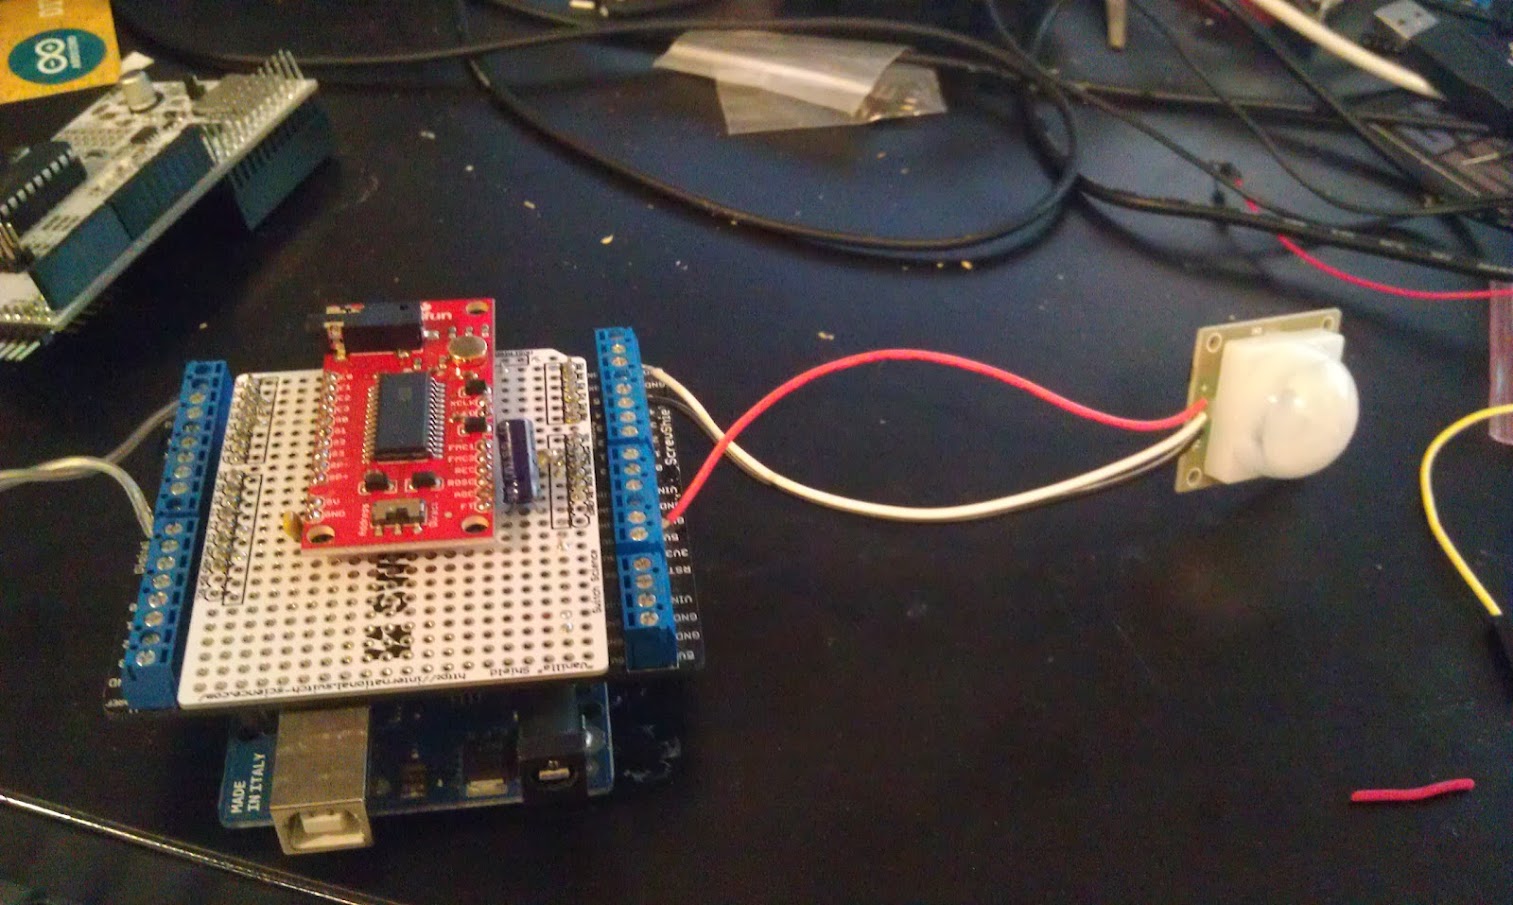
In order to make it more reliable, I mounted it on a protoshield. I also like using a proto-screw-shield to hook up the external components.

In this case, the motion sensor (https://www.sparkfun.com/products/8630) on the right, and the wire going off to the left connects to a powerswitch tail to control a fan for the ghost.
I used PC speakers connected directly to the jack on the sparkfun voice module.
A little about the PIR motion sensor. The data sheet says it operates at 12V, but sparkfun says it operates from 5-12V. I have a Parallax module that is a bit easier to use, but I couldn’t find it and once again YouDoIt rescued me with the sparkfun part. A few other things to note. Since it is open collector, you need a pullup on the input. I used internal pullups in my Arduino code. When I tried to run the system off of one of those USB battery packs, it was unreliable and had very short range. Using an AC adapter worked fine, but if I had to do it over, I might use a motion sensor designed for 5V. The other thing was that the wire colors were confusing. Ground was White, Signal was Black, and VCC was the only one that had a “normal” color of red. (GND is usually black.)
The code
You can find the code on github here. You can control it via the serial port by entering a message number (0-8) and then ‘r’ or ‘p’ for record or play. It uses the onboard microphone for recording.
I chose to use the button on the protoscrew shield as an arming button, but you can also control that through the serial port. ‘m’ toggles whether or not motion activates the sound and PowerSwitch tail output.
Here’s the complete code (at the time of this post) remember to install the ISD library first:
[code]
#include <ISD.h>
// delay between motion activations
#define ACTDELAY 10000L
// motion sensor
#define MOTION A4
#define ARMButton A5
// powerswitch tail
#define powerSwitch 7
// LED
#define LEDPin 13
ISD isd = ISD();
void setup() {
Serial.begin(115200);
// motion sensor
pinMode(MOTION, INPUT);
// open collector requires pullup
digitalWrite(MOTION,HIGH);
// powerswitch
pinMode(powerSwitch,OUTPUT);
digitalWrite(powerSwitch,LOW);
pinMode(ARMButton, INPUT_PULLUP);
pinMode(LEDPin,OUTPUT);
Serial.println(“enter a message number to play or record or r/p”);
}
// globals
int msg =0;
boolean motion = false;
boolean soundonmotion = true;
boolean powerswitchonmotion = true;
int lastReading = HIGH;
boolean ARMState = false;
long lastActivation = 0L;
void loop() {
// check arming button
if (digitalRead(ARMButton) == LOW){
ARMState = ARMState?false:true;
// cheap debounce
delay(500);
if (ARMState){
digitalWrite(13,HIGH);
soundonmotion = true;
motion = true;
powerswitchonmotion = true;
Serial.println(“Armed!”);
}
else{
digitalWrite(13,LOW);
motion = soundonmotion = powerswitchonmotion = false;
Serial.println(“Unarmed”);
}
}
//check motion sensor
long currentTime = millis();
if (motion){
int currentReading = digitalRead(MOTION);
if ((currentReading != lastReading) && (currentReading == LOW) && ((currentTime – lastActivation) > ACTDELAY)){
lastActivation = currentTime;
Serial.println(“activating motion”);
// if enabled turn fan on first
if (powerswitchonmotion){
digitalWrite(powerSwitch,HIGH);
delay(1000);
}
if (soundonmotion)
isd.play(4);
if (powerswitchonmotion){
delay(5000);
digitalWrite(powerSwitch,LOW);
}
delay(1000);
}
lastReading = currentReading;
}
if (Serial.available() != 0)
{
char c = Serial.read();
if (c >= ‘0’ && c <=’8′)
{
msg = (int)(c- ‘0’);
Serial.print(“msg selected: “);
Serial.println(msg);
}
else if (c == ‘r’)
{
isd.record(msg);
}
else if (c == ‘p’)
isd.play(msg);
else if (c == ‘m’){
//toggle motion activation
motion = motion?false:true;
Serial.print(“motion is “);
Serial.println(motion);
}
else if (c == ‘f’){
powerswitchonmotion = powerswitchonmotion?false:true;
Serial.print(“powerswitch is “);
Serial.println(powerswitchonmotion);
}
else if( c == ‘s’){
soundonmotion = soundonmotion?false:true;
Serial.print(“sound is “);
Serial.println(soundonmotion);
}
}
}
[/code]
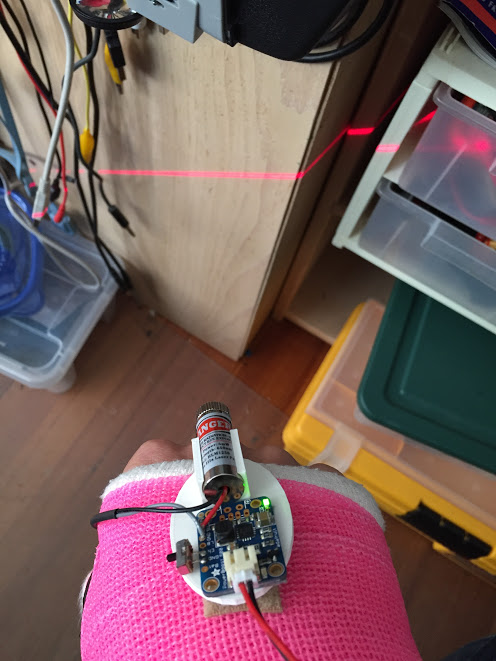
 Chinese laser pointer from ebay or aliexpress (don’t remember, I have a drawer full of laser modules). Adafruit powerboost 500 basic (If I’d had the full one, it could charge too, but this is what I had lying around). I designed a very basic platform in OpenSCAD, and stuck the board down with mounting tape. The enable switch is soldered directly to the board (I cut off one of the terminals.)


