Category Archives: Holiday

Holiday Ornament Design Challenge

Over the Holiday break, I challenged my family to design some ornaments for our tree. So far, only Mason (17 year old son) rose to the challenge, and I think he did very well indeed.

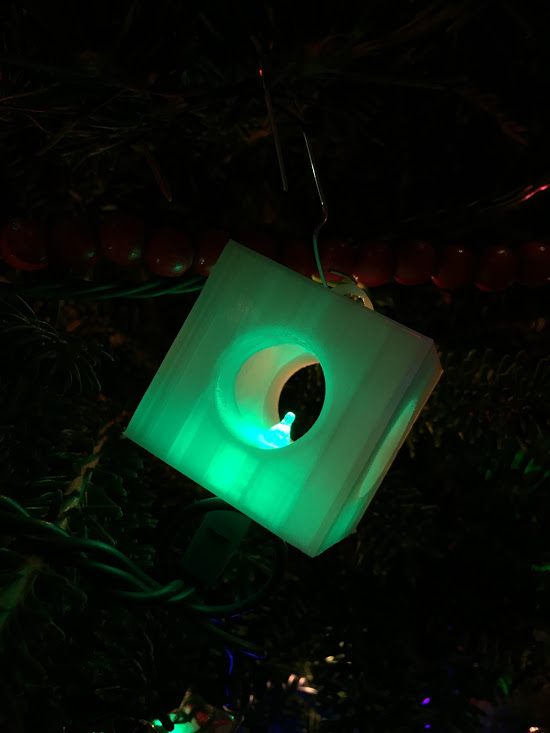
He did the designs in OpenSCAD, and at first hardcoded all the measurements until I encouraged him to make the designs fully parametric. This piece was designed to accept a light (from the string lights on the tree) in the bottom. Printed in Natural PLA with about 15% fill, giving it a kindof stripey, plaid texture.

This was printed without support on the Ultimaker 3. The very inside top is a little stringy, but hardly noticeable, and very easy to clean up.

The second design was really the first one he did, and isn’t fully parametric. You’ll have to scale it in your slicer, but it turned out pretty nice.
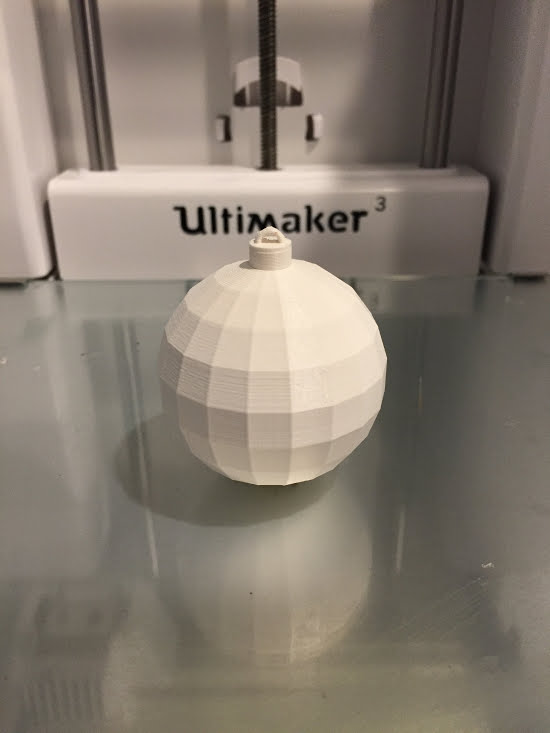
I printed it in white, thinking it might be fun to use a sharpie to color in the facets. This was printed with the PVA support.
I also printed it in transparent ColorFabb XT. I had a problem with the wipe tower, so the top was a bit messed up with mixed PVA and XT, which broke off, but a light fit into it, and I think it looks nice.

I encourage you to sit down and design with your family this holiday. You can get the sources for these at: http://github.com/osbock/HolidayOrnaments. Feel free to do some Pull requests to add your own designs!

For younger, or less mathematically inclined designers, I recommend Tinkercad.com, or I’m sure there are cool Ipad apps out there. Let me know if you have a favorite!
Lasercast Activate!

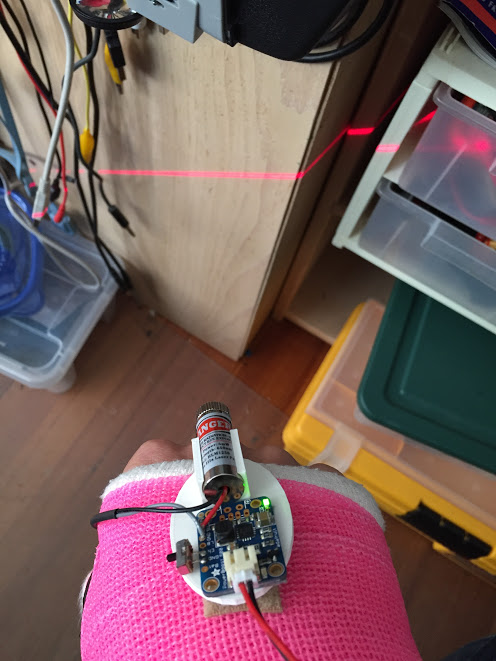
I recently got my thumb reconstructed (due to Osteo arthritis). And my new cast felt like it could use an upgrade. Laser! I figure it will be a good addition to my mad scientist costume for Halloween. Chinese laser pointer from ebay or aliexpress (don’t remember, I have a drawer full of laser modules). Adafruit powerboost 500 basic (If I’d had the full one, it could charge too, but this is what I had lying around).  I designed a very basic platform in OpenSCAD, and stuck the board down with mounting tape. The enable switch is soldered directly to the board (I cut off one of the terminals.)

Both the laser platform and the activation button are mounted with Velcro (the cast is coming off…) the button is superglued to the disk that holds the velcro dot.

If you want to make it, it’s very likely that your laser module will be sized differently so edit the openSCAD file to  fit.

3D printed circle the same size as a velcro dot

Holiday project: Dreideltron 5775

The Boston JCC  called me looking for maker activities for an upcoming Hanukkah event, and I thought of this little activity.

The copper tape is pretty unreliable though, and it may not be suitable for a big crowd where there may not be time to debug. I’d be curious to hear of other people’s experience doing paper circuits and the like. This was working perfectly for a while and then it stopped. I suspect the adhesive (which is supposed to be conductive), just stopped conducting. Perhaps I just need to buy higher quality copper tape?