Category Archives: Uncategorized

Introducing Raspbery Pi à la mode

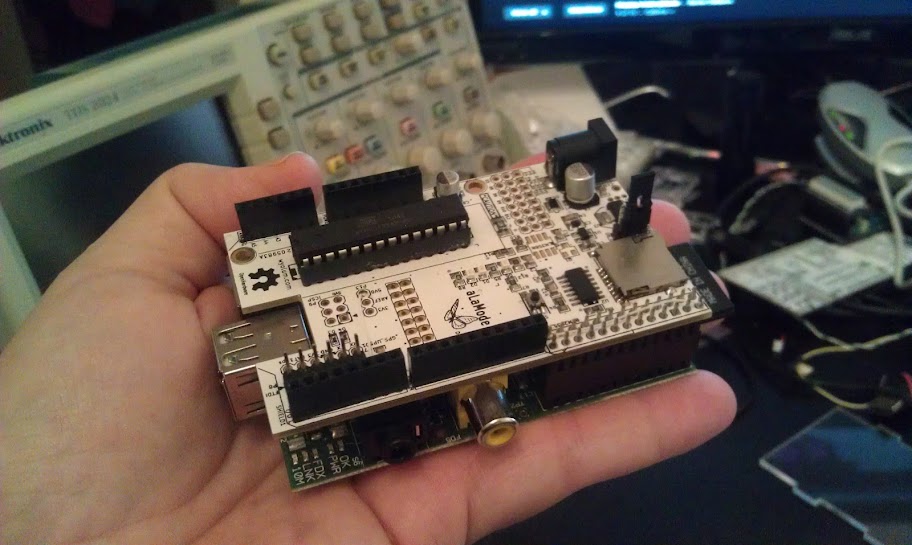
Our first prototypes are back, and working quite well! SeeedStudio fabricated the prototype boards and quickly sourced the parts.  The boards were of excellent quality. We ran into a few hiccups along they way, but Seeed Studio took care of them right away, and rushed to make up time.

If you haven’t been following, Anool Mahidharia, Justin Shaw and I from the Wyolum.com OSHW collaborative have been developing a stackable Arduino compatible for the Raspberry Pi.

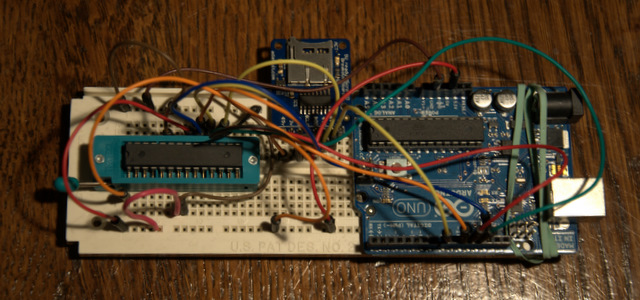
While there are lots of emerging examples of interfacing hardware to the Pi, it’s just not as easy as the Arduino, and the Arduino already has hundreds of libraries for interfacing with motors, sensors, and displays. While you can always plug an Arduino into the USB port, but it’s not as neat and embed-able as a a GPIO interfaced board. You can write a program on the Pi in any language you want to control or monitor your Arduino application, making Internet integration and control super easy. In addition you can even program the AlaMode directly from the Pi.

Here are the features including a few extra goodies:

  • Flexible power. Can be powered directly from the Pi, standalone with a battery or wall-wart, or USB power. This is important if your shield takes more power than the Pi can provide or if you want to undock it for standalone operation.
  • Programmable via the Pi’s UART on the GPIO pins, or an FTDI USB-Serial adapter or ISP.
  • Header for connecting Fastrax UP501 GPS.
  • DS3234 Real time Clock. The Pi doesn’t have it’s own battery backed RTC. You can set a program in the AlaMode to report the time to the Pi via serial or I2C
  • Micro-SD card slot. Useful for datalogging, and big-memory  for your Arduino applications
  • Row of Servo Headers connected to the PWM pins with a configurable power and ground rail

We’re in limited Beta right now, but as soon as it’s thoroughly tested, we hope to produce them for sale as soon as we can!

Holiday Gift and Activity Guide

My friend Bruce Henderson asked me to put together a few recommendations for STEM related activities for the Newton STEM site. Here’s what I recommended with a few embellishments for baldwisdom fans!

Instructables.com has thousands of cool projects, from the outrageous to the absurd — much of which is doable with kids and full of STEM. I have a few instructables there too, but you’ll find lots of crafts, projects for enhancing toys and lots and lots of simple electronics projects like the Atari Punk Console. You might want to browse it by different types of projects, like FoodPlay, or Living. Or search by topic like Lego.

EvilMadScience.com sells do-it-yourself and open-source hardware designs that originated from its blog, Evil Mad Science Laboratories.

Make cool designs on eggs, or anything round with the egg-bot, which also serves as an introduction to CNC (Computer Numeric Control) machines. Or build an LED Menorah.

MAKE magazine, a quarterly magazine with lots of do-it-yourself projects , is great subscription gift for makers of any age.  They also have a lot of great stuff in their store and recently had a special issue on cool kits, and most of them are available here.

Radio Shack is now carrying the Arduino, which is an easy-to-use, open-source electronics prototyping platform for artists, designers, hobbyists, and anyone interested in creating interactive objects or environments. There’s a Getting Started with Arduino kit that includes has the Arduino board, a great introductory book, and some electronic components to do the projects in the book.

While you can get Arduino at Radio Shack, my favorite purveyor of electronics kits and inspirational parts is Adafruit.com. They make their own opensource hardware kits, and carry the best of others. Adafruit also sells a variety of Arduino related shields, bundles and accessories, in addition to her original kits.

The EL wire starter pack makes it easy to create things like Tron costumes, and glowing bike frame lights. This doesn’t take a lot of special skills and is great for getting kids interested in technology (especially if they are craft oriented.)

One kit I’ve made with kids as young as 8 that they love is the TV-B-Gone kit. It allows you to turn off any TV, allowing for some good natured pranks, and introducing the idea that it’s fun to turn TVs off!

And of course, there’s Lego Mindstorms NXT — the Lego robotics system that allows you to make sophisticated robots and machines and program them in an easy-to-learn graphical environment. Used in schools and in First Lego League competitions, it’s best suited to Middle school students and above. Some people have difficulty getting started with NXT, especially if they don’t have an engineering background. Here are some great books to get you started:

Don’t just buy any of this stuff though! Get together with your family and make something!


Arduino Auto-programmer part 1

I thought I’d try something new with this project. Write about it as I go along, revealing all the mistakes and false starts, etc. and not wait for it to be finished. Heck, it might never be finished!

This project was inspired by the various arduino-ISP shield tutorials out there.  Evilmadscientist.com has an excellent shield, and Adafruit has a do-it-yourself tutorial. These generally make the arduino into an STK500 compatible USB programmer, and you need a computer to burn the chip. I thought, why not make a shield that had a micro-sd card on it and push a button, and bang! chip programmed!

Not many people probably need this kind of production, but I thought I could learn a few things.

Now Adafruit has another cool project based on another project called Optiloader, where you can embed a program in the Arduino program and burn standalone, but the program has to fit on the Arduino along with the programming code.

Here’s my basic plan of attack:

  1. Decide what I want the project to do. Here I brainstorm a bunch of features and put it into a google doc. I then prioritize what I want for the first iteration.
    Here’s basically what I came up with:
  2. Project Overview:
    Create an Arduino Shield for standalone programming of atmega chips from files stored on a micro-sd card. First iteration will handle one program on the card (selection of files would require UI)
    Functions:
    • Program chip from files on SD card
    • Read chip to files on SD card
    • Maintain ArduinoISP functionality?
    • Log ArduinoISP session to card?
    • replay ArduinoISP session from card?UI
      • Read(read from chip to SD card) button
        • Green Light indicator
      • Write (program chip from SD card)
        • Red LED indicator during/flashing green at finish
      • Error indicated via flashing red
      • If USB is connected, information printed via serial
  3. Order any parts I need. In this case, I bought a micro-SD breakout board from Adafruit. This has a voltage shifter chip to protect the cards (which use 3.3 V from the 5 V Arduino signals. I already had a zif socket.
  4. Breadboard the project. As you can see above I did the minimum. For the “shield version” I’ll probably also add some buttons and indicator LED’s
    Here’s the wiring to the atmega/ziff socket (from the adafruit tutorial):

    1. Pin 1 to digital 10 – Blue
    2. Pin 7 to 5V – Red
    3. Pin 8 to Ground – Black
    4. Pin 9 to digital 9 – Gray
    5. Pin 17 to digital 11 – Brown
    6. Pin 18 to digital 12 – Orange
    7. Pin 19 to digital 13 – Yellow
    8. Pin 20 to +5V – Red
    9. Pin 22 to Ground – Black
      SD Breakout Wiring:
    10. GND to Ground
    11. 5V to 5V
    12. CLK to Arduino Pin 13
    13. DO to Arduino Pin 12
    14. DI to Arduino Pin 11
    15. and CS to pin 8 (important as this has to be different than the line used to select the 328!)
  5. Test the individual parts to make sure they don’t interfere with each other. I loaded the Arduino ISP code, and programmed an atmega328, and I loaded the SD library and read some files off the card. You’ll also need to change the code line in the SD example code to use the different chipSelect line.  I learned/realized a couple of things:
    1. I should probably include a crystal/oscillator so that you can burn fuses that require an external oscillator (like the Arduino itself)
    2. One of the SPI lines is tied directly to the SD card activity light. This means that that light will flicker when the chip is being programmed.

This is as far as I’ve gotten so far. Next:

  1. Write the code to read Intel Hex files from the card
  2. Define and write code for a file for fuses
  3. Adapt Optiloader code to write data read from the card
  4. Implement user interface

All Buddha’s Throughout Space and Time

Buddhas
Illustration by Kevin Osborn based on an original image by ebay seller 2411florence

I’ve been looking for a fun art project for a while. I came up with an idea that is probably silly, but I think it might just be fun.
I’ve ordered a latex Buddha mold and am planning on making 108 Buddhas. The original vision that prompted this was a large number of Buddhas stretching out to infinity. Also, I was thinking of my 365 self portrait project where I was doing something everyday. Everyday is a bit stressful at the current time, but I do like the idea of working fairly consistently but with variety. A couple of thoughts were to make an ice Buddha (for impermanence), different materials (plaster, resin, dirt) and trying to tie them in to various dharma concepts. I think it will probably take about a week per Buddha, and there will probably be a few failures that won’t make it into the set. I can think of about 5-10 variations right now, but that’s far short of 108, so it should be interesting and very challenging. I also think it would be fun to invite others to do Buddha images, paintings, sculptures and whatever, and share them on a flickr group.
I have a few more details in mind that I’ll share later, but wanted to know what people think?

Change of Pace

I haven’t updated this in a while, largely because I really no longer work in IT. I’m doing research now (augmented reality and eddy current NDE research) and find myself wanting to share again, but not so much work stuff, as things I’m interested in and having fun with (which sometimes will include work… we just bought a Kinect, stay tuned!)

So, from this day forth, I declare this blog to be about fun, geeky fun!

Let the posts begin!

USBootin’ goodness

LIve CD’s have been around for a while and are a great way to try out the many different linux distributions. I recently had to find a better linux install for an Asus eee PC, and I could have dug up a USB cdrom drive, but more convenient would be booting from a usb thumb drive. Many distributions have tools to create bootable USB’s, but not all.

Xubuntu’s wiki pointed me at this terrific tool that will create a Live-USB from any distribution. UNetbootin will even download the the iso for many of the standard distros. If the one you are interesteed in isn’t on the list, simply download the iso and use their diskimage option. As an added bonus, there’s both a windows and linux version.

A great tool to add to your toolkit!

Ada Lovelace Day: Honoring Women in Science and enginnering

Today, March 24 is Ada Lovelace day, and I pledged to blog about a woman in science or engineering that had a profound impact on me. Ada Lovelace was a protege of Charles Babbage who wrote about his work on the “Difference Engine” widely recognized as the first computer (purely mechanical) including a set of notes in her appendix that is recognized as the first computer program. She also speculated on uses of computers far outside numeric computation, including the composition of music.

There are a lot of contemporary women who are currently inspiring me, including hackers Limor Fried, Jeri Ellsworth, and Lenore Edman, but my thoughts turned to a much earlier influence, my High School chemistry teacher, Dr. Donna Bogner.

Dr. Bogner was one of the best teachers I have ever had. Constantly looking for new ways to inspire kids, tolerant of our explorations (and explosions!) letting us discover things for ourselves, even when it meant taking some risks, as long as we observed safety precautions.

She went back to school on her own initiative to learn computer programming so she could add that to the High School curriculum, at a time when the nearest computers were a couple blocks away at the Junior College. The initiative, curiosity, and “just try it” attitude I learned from her has served me well, both in my career and as a dad, and school science volunteer.

Since I graduated from Hutchinson High, Dr. Bogner taught freshman chem at Wichita State for 15 years and  spent some time at Princeton as a Woodrow Wilson Fellow. This led to consulting for Exxon and Pfizer, all around developing science materials for the secondary classroom. She did 5-6 summer workshops a year for the Dreyfus institute all over the country.

Dr. Bogner is still active in reaching young minds in what she describes as her “fifth retirement” developing science curriculum at  Mid-Continent Research for  Education and Learning. Among other things, she translates technical details from  NASA’s extraterrestrial missions and Nano-chemistry  into materials for classroom use. Particularly interesting to me, she also adapts these materials into forms that are accessible to visually impaired students which she understands because of her own visual impairment.

I just wanted to say WOW! and thank you, for all your inspiring work, Dr. Bogner, and hope some other girls will read this and be inspired to follow in your footsteps!

Archiving Data from Massive Production Tables

Just a quick tip.

Data is valuable, but as it grows in your production system, it can slow everything down.

If you have data that has grown to millions of rows, and decide to archive it off your servers, and you have replication/sharding going, selecting into archive tables and deleting millions of rows can cause your replication to back up.

Another strategy, though requiring downtime, is quicker:

  1. Make sure nothing is updating the table you are archiving.
  2. Select the amount of data you want to KEEP into an equivalent schema table with equivalent indexing.
  3. rename the original table to indicate it’s oldness.
  4. rename the new table to the original table name
  5. Turn your updates back on.

Then, going forward you can use the siphoning off approach for smaller chunks of data that fall off the end of your window (30, 90 days, whatever.)

Welcome to Bald Wisdom!

When looking for a domain name for my IT career related blog, I came up with Bald Wisdom. I’m not trying to say that I’m wise, though I certainly am bald! It’s more about seeking wisdom, and sharing any little tidbits I’ve learned.

While I anticipate most articles will be technical in nature, I imagine I will wander into management and leadership territory once in a while, as getting things done technically requires organizational support and the efforts of good team members.