Category Archives: AlaMode Examples

NovaBooth – Improving the Open Source Photobooth

NoVa SnapAs you may have read here previously, we (the Wyolum Gang) created a photobooth for the Open Hardware Summit, for the purpose of customizing the e-paper badges we made for the conference attendees. This processed the pictures into a small black and white image for the e-paper badge, and saved it onto the badge’s micro-sd card.

I was headed to help out at the Northern Virginia Maker Faire, and thought it would be fun to update the photobooth to take full color pictures, upload them to the Internet and offer to email them to friends and relatives.

The email message and logo files are easy to add and customize.

For basic construction, visit the original post, but download the new software here:

github: https://github.com/wyolum/NovaBooth

The fabricate directory has the laser cut files, arduino for the AlaMode Program, and scripts for the python photobooth code.

Edit custom.py to customize the email subject and message. config.py contains the authentication information for the google email and posting accounts. You’ll need to set up application specific passwords for this on your google account. You can use the same account, or separate.

Wireless keyboard, had to add a powered hub.

Problems

  • External powered hub was a pain.
  • Proto-screw shield was too heavy and lifted off
  • Some of the nuts came loose in travel.

Photobooth 1.5

To solve the first problem, I determined to replace the non-powered hub in the photobooth with a powered one.  I tried to add power to the unpowered hub, and this worked at first, but then took out the power supply and made the raspberry pi flakey too.

Scratch that, I ended up using a small belkin powered hub. I y-connected the power to it.
I noticed that  a convenient orientation put  4 ports right next to the edge,  so I cut a hole in the box to expose them.

Luckily AlaModes ship without shield headers installed, so I replaced the AlaMode and protoshield with an AlaMode that was directly soldered to the button, led-strip, power and ground.

I updated the AlaMode’s photobooth program directly from the photobooth. Apparently the new AlaMode’s pullups weren’t as strong, so I added a 5.7k pullup to the Button Pin.


Using GPS with AlaMode

We included a header for the UP501 GPS module on AlaMode.
The UP501 is popular, and has the additional advantage of having a PPS output which can be used to do ultra-precise timing.

Unfortunately we made a little mistake and reversed the silkscreen on the connector (documented in this forum article.) The actual orientation is actually quite logical the RX pin of the GPS lines up with the corner of the AlaMode.

Mikal Hart wrote a wonderful GPS library called TinyGPS
http://arduiniana.org/libraries/tinygps/

The GPS library doesn’t actually talk to the GPS module, but parses the output (NMEA statements) In this case, our example code uses the SoftwareSerial library (also by Mikal Hart!) to listen for the output and feed it to the GPS library.

The pins used in AlaMode are 6 (receive on the Arduino, output from the GPS), and 4 (Transmit on Arduino, input into the GPS module.) Note you shouldn’t actually write to the GPS module from the Arduino, as it’s a 3V module, and the Arduino’s outputs are 5V. It is, however safe to read.
SoftwareSerial nss(6, 4);

also in the setup() function initalize the SoftwareSerial for 9600 baud:
nss.begin(9600);

After that, you are good to go! Stay tuned, in a future post, we’ll have a guest blogger who will be using the GPS feature of AlaMode to build a compact WarDriving module.

Here’s a copy of the GPS example code, pre-edited for use with AlaMode:


CNC AlaMode

AlaMode is in stock and shipping now from Makershed and SeeedStudios.

I’m a maker, and as a maker, I love tools. As a computer geek, I’ve long been interested in computer controlled tools. When Riley Porter of Synthetos suggested using AlaMode to control a CNC router from a Raspberry Pi, I was thrilled!

Riley and Alden Hart of Synthetos.com have been developing controllers for DIY CNC machines, and they make the controller for the Shapeoko, the lowest cost DIY CNC router around. They sent me the grblShield that is normally shipped with an Arduino in the complete Shapeoko kit.

I ordered the mechanical kit from Inventables.com, and then picked up stepper motors and a power supply from some surplus outlets.

This is of the simplest and most rewarding applications of AlaMode. People often dedicate an old computer to their CNC routers, but being in a dusty environment, it can be hard to keep everything running well. By stacking the credit card sized AlaMode, the Raspberry Pi and the GRBL shield, you get a wonderful networked platform for CNC that can be neatly boxed (though I haven’t gone that far yet!)

After assembling the Shapeoko, and wiring the motors to the grblShield, you’ll need to program GRBL onto AlaMode. Download the GRBL  optimized for GRBLShield, and assuming you’ve set up Raspberry Pi with the AlaMode version of Arduino, you can program it directly from the command line:

[code]avrdude -c alamode -b 115200 -P /dev/ttyS0 -p m328p -U flash:w:grbl-Shapeoko.hex[/code]

In the next post, I’ll talk about sending jobs to the AlaMode Shapeoko, including over the network!


AlaMode: Web controlled train example

Update!: You can now buy AlaMode at Seeedstudios

Here’s an example of using the AlaMode with the Raspberry Pi.

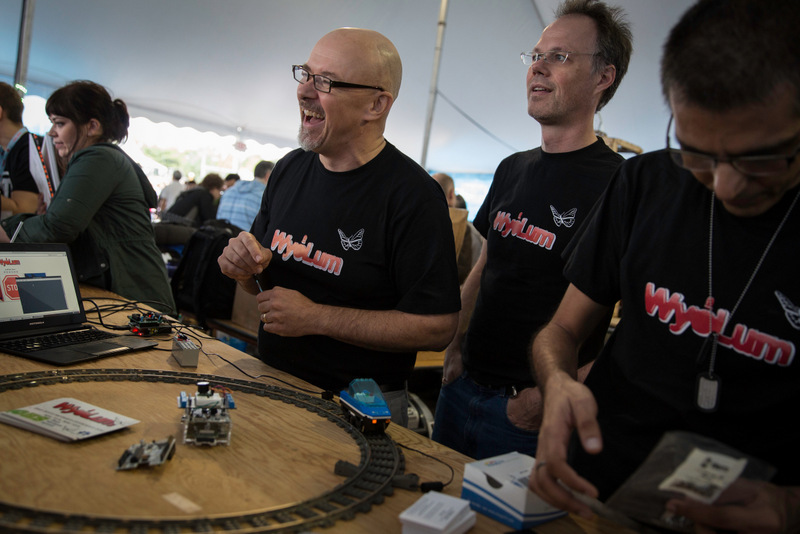
We had a great time demoing the AlaMode at MakerFaire. We got invited to demo in the MakerShed, because …. Surprise! MakerShed is going to carry AlaMode!

For this demo,  I took an adafruit motorshield and used it to modulate the power to a 9V Lego train track.

Photo by Brian Kronz

The Arduino code is pretty simple, using Serial.read to interpret single characters as commands for controlling the motor shield. “f” means forward, “b” means back, “s” means stop. 1-9 sets the speed.  You’ll also need to install the AFMotor  library.

Program the aalegotrain.ino sketch from here: https://github.com/wyolum/alamode/tree/master/examples/train_demo

You can either do this with an FTDI cable on another computer, or directly with the Arduino IDE on the Raspberry Pi.

The ala-modey part of this is to use the AlaMode to do the controlling motor bit. The Raspberry Pi will control the train through a web interface.

Install  lighttpd on the Pi (sudo apt-get install lighttpd) and put the web files from the example into /var/www.

photo by Drew Fustini

It’s a little slow because it’s a simple CGI script (spins up a whole process with each request.) A python script interprets button presses on the web page, and uses pyserial to send the characters to AlaMode.

Drew Fustini of Element 14 did a great blog post on our demo.

Here’s a video he posted:

[youtube]http://www.youtube.com/watch?fv=y-9g_mfdFhc[/youtube]

If you have any questions, join the conversation at the Wyolum forums.