There are two kinds of memory(well three including EEPROM, but we won’t deal with that here) you can run out of when doing an Arduino project (or any embedded project):
- Flash Memory: For a lot of applications, the Arduino has a fairly big flash memory (the UNO and all atmega328 based Arduinos give you 32k flash.) The Arduino IDE will also tell you if your program size exceeds the amount of flash in the particular Arduino you have selected.
- Static RAM: Atmega328 in the UNO gives you 2k of RAM. This is the most precious commodity in Arduino programming, and it’s often surprising how fast you can run out. The bad thing is, the IDE won’t warn you, and your program can go from working to behaving really weirdly by doing something as simple as adding an additional debug print statement. This post will attempt to explain this, and give you a few tips for understanding your RAM use.
Where Did it All Go?
When you run out of SRAM, your program can just stop working, for reasons ranging from one data structure overwriting another (so your program does something based on the wrong value) to overflowing into the stack. When that happens, generally, your program dies a horrible death, because returning from subroutines can cause the processor to jump to random places in memory. If you make an innocuous change to your code (like adding another debug statement) and your program suddenly behaves very differently, chances are you have run out of SRAM.
It’s obvious if you declare large variable arrays like:
int valueArray[1024];
would instantly overflow memory because int’s occupy 2 bytes in atmega land. You also need to leave room for stack, and any other variables your libraries, and the Arduino software itself uses.
What’s Harvard got to do with it?
Not so obvious is the fact that:
Serial.println("Hello");
const char constantString[] = {"Hello"};
both occupy 6 bytes in both flash memory and in SRAM (c-strings are terminated with a Null, or 0x00 byte). The reason is AVR 8 bit microcontrollers use a Harvard architecture addressing scheme. This means that when an instruction addresses memory, there are two versions, one that addresses program memory (flash), and another to address RAM. Most routines like Serial.println use regular RAM, as they don’t know if you’ll be passing in constant info or stuff that you’ve constructed. As a result, even static strings (with a const declaration) are copied from flash to SRAM at system startup. It’s possible to write routines to only use flash (using the PROGMEM attribute) and it’s definitely useful, but that’s covered elsewhere.
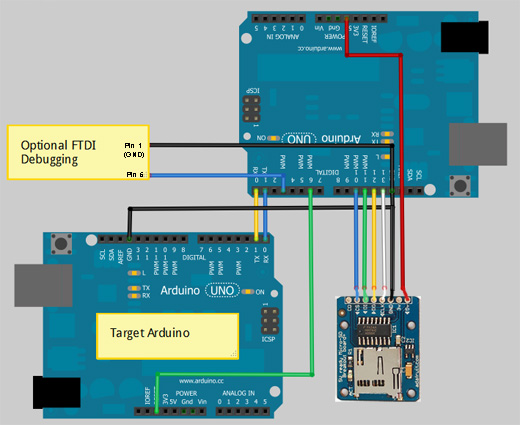
I ran into this porting the avrdude stk500 routines to Arduino, blindly converting the printfs into Serial.print statements. In order to get enough RAM I ended up using numeric codes for errors (I’ll probably eventually get around to PROGMEM-ing them).
So, how do you tell if you are nearly running out, or have already? The IDE won’t tell you, so you have to dig in a little.
The build process for arduino produces an “ELF” file or Executable and Linkable File. This is used to create the actual HEX file for programming, but still has memory segment information embedded in it.
First find your build directory. On Windows 7 this is \users\<youruser>\AppData\Temp\build<a bunch of numbers>.tmp
Now, assuming you have the avrdude files somewhere in your path, use the command:
avr-size -C --mcu=atmega328p <yourelf-file.elf>
For example, the current version of Bootdrive gives me:
avr-size -C --mcu=atmega328p BootDrive.cpp.elf
 AVR Memory Usage
 ----------------
 Device: atmega328p
Program: 19272 bytes (58.8% Full) (.text + .data + .bootloader)Data: 1340 bytes (65.4% Full) (.data + .bss + .noinit)
It’s probably best not to go beyond 95% full for your Data (that’s the SRAM part) to save room for your stack, and even less if you pass big variables on the stack or have deep call chains.