I’m a big fan of Scratch, the educational programming language created at MIT. International Scratch Day is coming up, and when we went two years ago, we had a blast. Last time, I added a distance sensor to an Arduino, made it emulate a Scratch Sensor Board, and put it under a trampolene. This year, I decided to document the general process of making your own scratch sensors and bring a compact sensor module for the kids to play with.
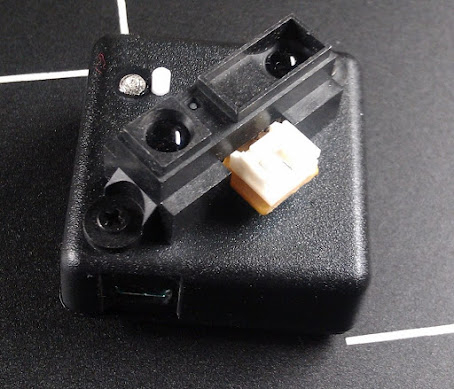
At one point during our research at work, we needed a way to measure the movement and relative distance of a camera platform, so I designed, and my tech put together a combination of a Teensy (Arduino Compatible microcontroller), an Adafruit ADXL335 Accelerometer breakout, and a Sharp IR distance sensor.
I dug up my old code for the trampolene hack, which was based on some code I got off the Scratch forums. It didn’t work!
What we are actually doing is emulating what was originally called a “Scratchboard” and now produced by a company called the Playful invention company and called a “PicoBoard”.
There’s a spec (and schematics) at http://info.scratch.mit.edu/sites/infoscratch.media.mit.edu/files/file/ScratchBoard_Tech_InfoR2.pdf
Turns out, the platform used to be more forgiving, and now it expects a report of all the sensors (whether we are using them or not.)
The IR distance Sensor outputs an analog voltage proportional to the distance to the nearest thing in it’s path, and likewise the accelerometer outputs a voltage proportional to the acceleration (including gravity). I mapped the distance sensor to the “slider” sensor, and the X, Y and Z outputs to the Resistance A, B and C sensors.
Here’s a demo video:
[youtube]http://www.youtube.com/watch?v=wVa8QUz5DxI[/youtube]
I’m planning on re-working the interface code into an Arduino Library, and I’ll post that here when I get it done.
In the meantime here’s the Arduino code:
// Scratchboard emulation
// by Kevin Osborn
// http://baldwisdom.com
// Feel free to use this code in any way you wish! (Though if you want to link
// to my blog, that would be cool)
// The Scratchmote has a sharp ir distance sensor
// and a 3 axis accellerometer

#define DISTSENSE A0
#define ACCELX    A1
#define ACCELY    A2
#define ACCELZ    A3

#define TESTMODE  0

// Format output for ScratchBoard emulation
// sensor=0-7, value=0-1023 (rescaled by Scratch to 0-100)
// 0="A", 1="B", 2="C", 3="D",
// 4="Slider", 5="Light", 6="Sound", 7="Button"
void ScratchBoardSensorReport(int sensor, int value)
{
  Serial.write( B10000000
                 | ((sensor & B1111)<>7) & B111));
  delayMicroseconds(400);
  Serial.write( value & B1111111);
}
int flatx,flaty,flatz; // might be used to set midpoint
int maxX,minX; //testing purposes
int lastx,lasty,lastz;

void setup()
{
  pinMode(DISTSENSE, INPUT);
  pinMode(ACCELX,INPUT);
  pinMode(ACCELY,INPUT);
  pinMode(ACCELZ,INPUT);

  lastx =maxX= minX = flatx=analogRead(ACCELX);
  lasty = flaty=analogRead(ACCELY);
  lastz = flatz=analogRead(ACCELZ);

  Serial.begin(38400);
}

void loop()
{
  int distance = abs(map(analogRead(DISTSENSE),0,650,0,1023)-1023);
  //experimenting with the ADXL335 gives us readings between low single digits
  // and < 700 for human powered movements   int x = map(analogRead(ACCELX),0,700,0,1023);   int y = map(analogRead(ACCELY),0,700,0,1023);   int z = map(analogRead(ACCELZ),0,700,0,1023);      int rx = (x +lastx)/2;   int ry = (y +lasty)/2;   int rz = (z +lastz)/2;      lastx = rx;   lasty = ry;   lastz = rz; #if TESTMODE Serial.println(distance); /* Serial.print("x,y,z= "); Serial.print(x);Serial.print(","); Serial.print(y);Serial.print(","); Serial.println(z); */ if (x > maxX) maxX=x;
if (x< minX) minX=x;
Serial.print("maxX = ");Serial.println(maxX);
Serial.print("minX = ");Serial.println(minX);
delay(500);

#else
if (Serial.available())
{
  if (Serial.read() == 0x01){
  ScratchBoardSensorReport(0,rx);
  ScratchBoardSensorReport(1,ry);
  ScratchBoardSensorReport(2,rz);
  ScratchBoardSensorReport(3,0);
  ScratchBoardSensorReport(4,distance);
  ScratchBoardSensorReport(5,0);
  ScratchBoardSensorReport(6,0);
  ScratchBoardSensorReport(7,0);
  }
 //ScratchBoardSensorReport(1,analogRead(POT2));
 // ScratchBoardSensorReport(7,digitalRead(BUTTON1)?0:1023);
  delay(30);
}
#endif

}
The Scratch examples are on the scratch site:
- Accelerometer demo: http://scratch.mit.edu/projects/osbock/2542866
- Distance sensor theremin: http://scratch.mit.edu/projects/osbock/2542860
Note you can’t play them directly from the site, as you need the sensors!