I’m teaching an Arduino Robot class June 29 from 6-8pm at YouDoitElectronics in Needham, Ma. The cost is $99 and you get to take home the robot you build. I’ll show you how to use an Arduino to control DC motors, and read sensors to react to the environment. The robot we’re building will have a sonar sensor for distance, and two line detectors for following a line.
To register email your name phone number and number of participants to events@youdoitelectronics.com. Please include Arduino Robot Workshop in the subject line. You will receive a call back within 1-2 business days. Fee is required at time of registration prior to the start of the workshop. Once registration and payment are complete a reservation confirmation number will secure your spot.
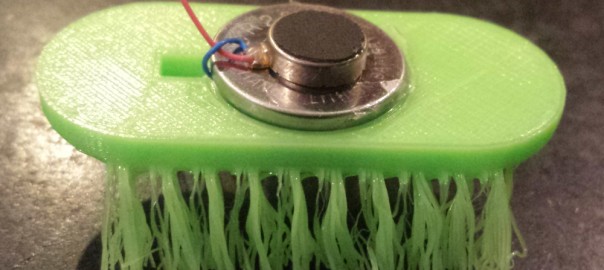
3D printing Bristlebots gives you lots of creative options, and here’s a new way to create the bristles, or legs of the bots. More details follows the video, and the source code is at: https://github.com/osbock/droobots
Mark Peeters, came up with a clever idea for making lacy fibrous flowers with a 3D printer, by taking advantage of FDM’s greatest weakness: the need to support overhanging structures.
Turning them over in my hand, I had the insight that they could be perfect bristles! I fired up OpenSCAD and started designing a simple bot:
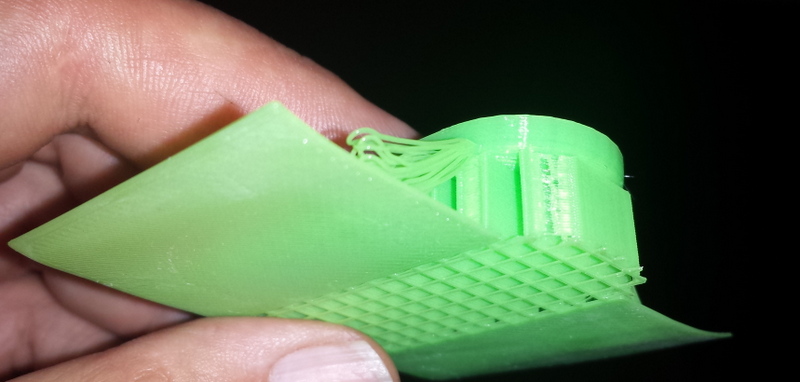
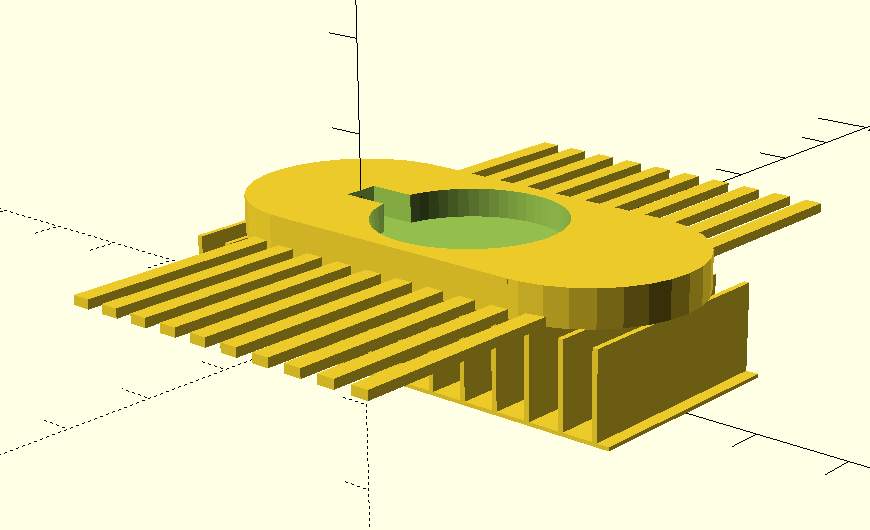
The trick is that you have to let them droop down, so you have to have something in the center to hold it up, and have the legs be unsupported. I designed in support material for the body.
It’s tricky if you make the support walls to thin, the slicer may ignore them. Too thick and it’s harder to remove. This version works fairly well, but is a little too heavy for my taste.
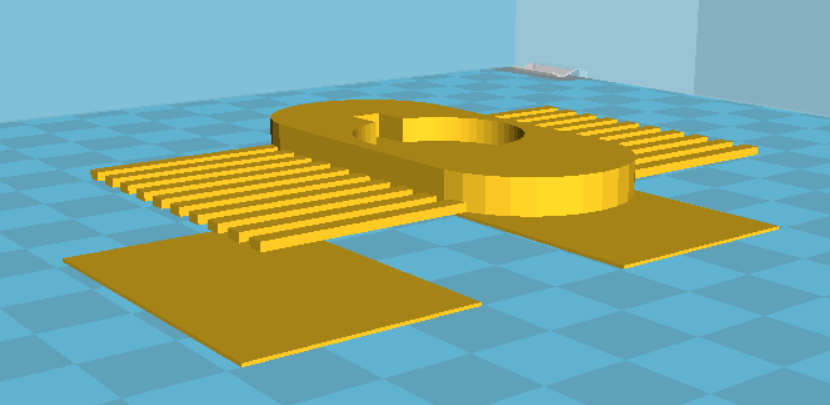
I use Cura, and I was thinking about how to use it’s native support which is very thin and easy to remove. There is an option for printing support material only when there is an overhang on the baseplate. I put thin (.4mm) rectangles under the legs, but not under the body:
This works out quite nicely, and gives a speedier print.
The other thing that’s helpful is to turn off the fan during the leg creation. You can either use the “Tweak at Z” plugin, if you use Cura, or edit the Gcode. I located the layer where the legs started and inserted an M107 (stop fan) command, and then when it was on a layer above, add M106 S255 (fan full on)
After printing, I use a hot air gun to soften the legs to press them down more to a right angle. This give a more energetic movement than the splayed legs right off the printer.
You can also experiment with trimming them with scissors.
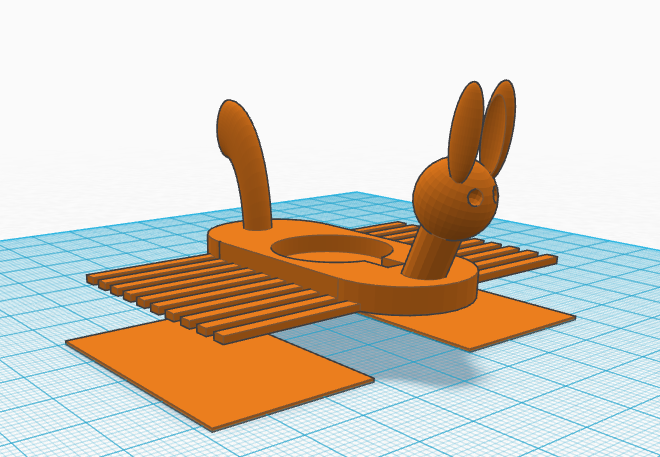
Last but not least, I imported the basic STL into tinkercad, and added a head and tail for a little more pizzazz!
The Earl Center folks at Wheelock college are doing Bristlebots at the Cambridge Science Festival and I put together a bunch of kits for them. I updated my resource page with updated information about getting the materials and the tools you need. Here’s the Updated Info
And Here are a couple of videos to entertain you from previous workshops:
[youtube]https://www.youtube.com/watch?v=JiCylYs6G0o[/youtube]
[youtube]http://youtu.be/MR3K_uxIOSs[/youtube]
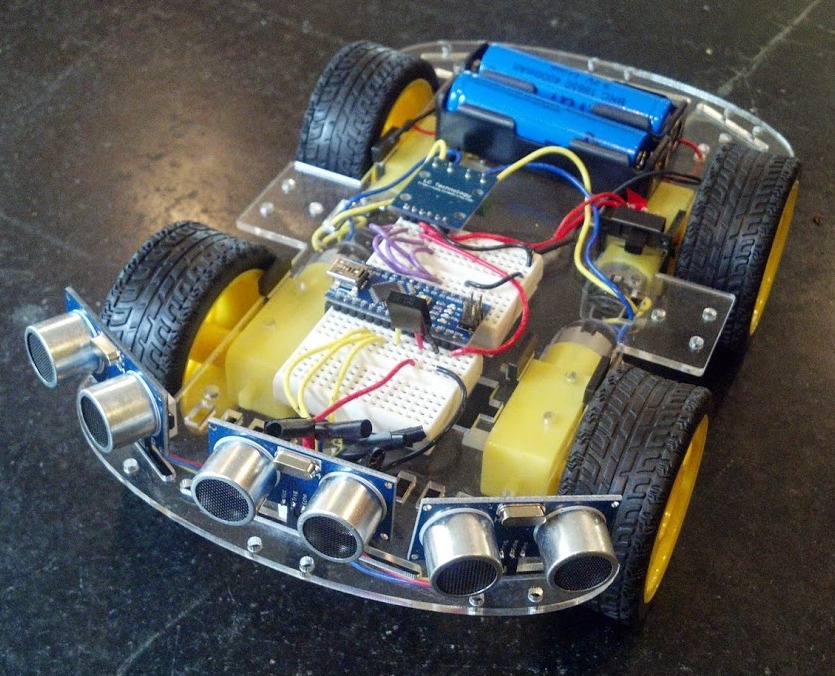
Joe McDermot (leader of the Boston Robotics Meetup) discovered many members of the Boston Robotics Meetup had never scratch built a robot, so he sourced some cheap components from China and led a group build session. Joe did a fantastic job, keeping the price to $60, for a robot with 4 motors, Arduino clone controller, 3 ping sensors and IR control. (Joe’s a modest guy, but I call it Joebot)
After building it, a lot of the members had trouble with the programming, trouble I’ve seen when people attempt to do slightly more complex projects on the Arduino, after doing the basic Blink, and other examples.
In this series of posts, I will attempt to show how to coordinate several activities in an Arduino program. While the robot is an excellent challenge, the lessons here can be applied to any project where you have to “simultaneously” read sensors, control actuators, etc.
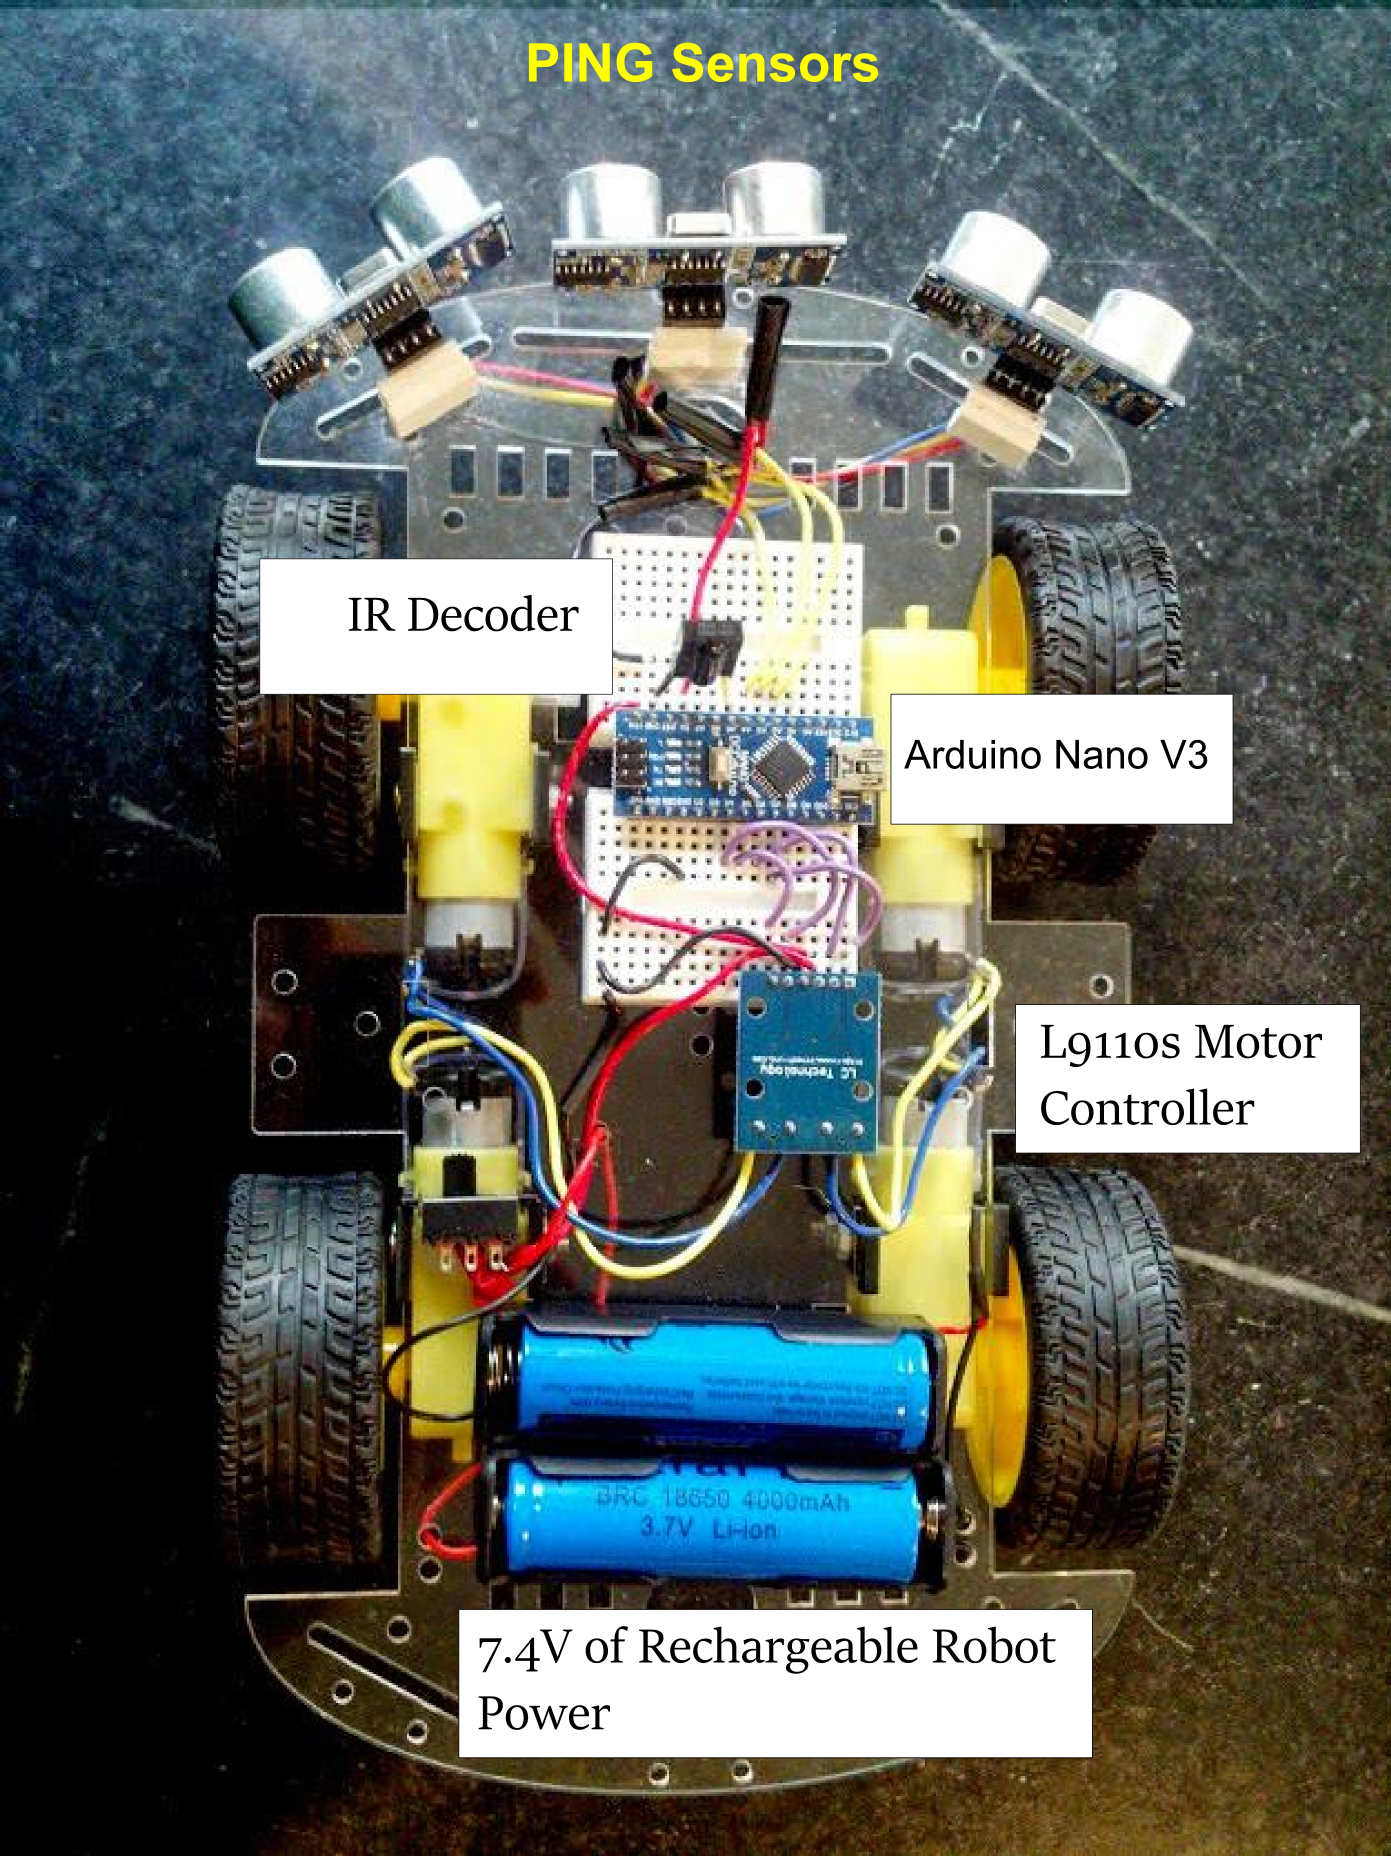
Bot-BOM:
4 DC gear motors with Wheels
Acrylic base
L9110s BLUE motor control board (2 channel, 2 wire control per motor)
IR receiver
2 – Ping type distance sensors
Arduino Nano V3 Clone
Breadboards, wires, etc.
One note of caution here, many of the Nano clones used counterfeit FTDI chips, and were bricked by the new windows driver. DCCDuino, is actually not an out and out copy and uses a different USB-Serial chip, and works well.
Next post we’ll work out how to handle motor control.

 This works out quite nicely, and gives a speedier print.